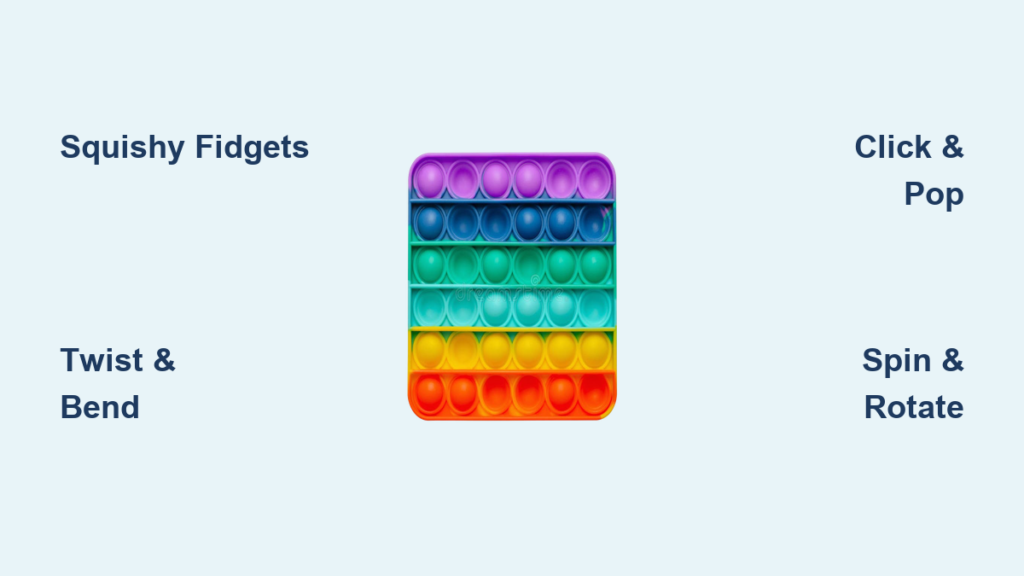
Squishy toys are soft, satisfying fidgets that slowly bounce back after being squeezed, making them perfect for stress relief, sensory play, or creative crafting. If you’ve ever wondered how to make a squishy toy at home, you’re in luck. With simple materials like glue, balloons, or even mochi, you can create professional-looking squishies that rival store-bought versions. From viral TikTok dumplings to edible mochi squishies and silicone replicas, this guide covers every proven method to make squishy toys safely and effectively. You’ll learn which techniques work best, avoid common failures, and discover how to customize colors, textures, and scents.
Lysol-Activated Glue Method
This is the top-rated DIY method for creating squishy toys that feel just like commercial taba squishies. The result is stretchy, glossy, and slow-rising.
Mix Glue and Activator
Pour half a cup of white school glue into a bowl. Add a few drops of food coloring and glitter if desired. Spray Lysol disinfectant spray five to ten times while stirring continuously. The mixture will begin to clump and pull away from the bowl.
The science behind this method works because Lysol contains boric acid, which cross-links PVA glue molecules into a viscoelastic polymer. This gives the squishy its signature slow-rise property.
Knead and Mold
Remove the clump and knead by hand for two to three minutes until smooth and stretchy. Lightly coat a silicone mold with Vaseline, then press the mixture in firmly. Insert small charms or beads if desired. Let it sit for one to two hours to fully set.
Pro tip: Seal the finished squishy in a zip bag with flocking powder to create a fuzzy outer layer that feels premium.
Silicone A+B Casting Method
For long-lasting, glossy squishies that look exactly like store-bought, use the two-part silicone adhesive method.
Prepare the Silicone Mixture
Coat your mold with Vaseline as a release agent. Mix equal parts silicone adhesive base and hardener in a disposable cup. Stir for thirty to sixty seconds until fully blended. Add acrylic paint or glitter for color and sparkle.
This method produces a rubbery, waterproof squishy that won’t dry out over time. The glossy finish mimics high-end commercial brands.
Pour and Cure
Carefully pour the mixture into the mold. Let it cure at room temperature for two to four hours. Gently flex the mold to release the squishy.
Safety first: Work in a well-ventilated area and wear gloves, because uncured silicone can irritate skin.
Enhance the Texture
Place the cured squishy in a sealed bag with pom-poms for internal crunch, flocking powder for a soft fuzzy coat, or tiny beads for added sensory feedback. Shake to coat evenly. The result is a premium-feel squishy that rivals expensive brands.
Balloon and Slime Dumpling Squishy

This TikTok-famous method creates adorable, expressive dumpling squishies using balloons and stretchy slime.
Shape the Balloon
Cut the top off a balloon and flip it inside-out. Tie the open end with a plastic hair tie to create a pleated dumpling look. Flip it back so the knot is hidden inside.
Use clear or white balloons for a realistic steamed dumpling appearance.
Fill With Stretchy Slime
Use thick, cohesive slime made from clear glue. Spoon or funnel it into the balloon through the tied opening. Seal tightly with a second hair tie or knot.
Warning: Avoid runny slime because it can leak and break the balloon during play.
Draw a Face
Use permanent markers like Sharpie to draw cute faces. Reference popular TikTok designs like sleepy eyes, blushing cheeks, or a giggling mouth.
Pro tip: Add a white highlight behind black lines for better contrast and realism.
Memory Foam Carving Technique
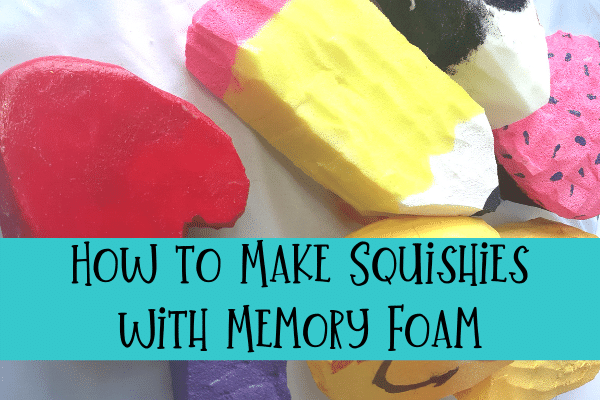
Perfect for kids and classrooms, this method uses foam from old pillows to make soft, paintable squishies.
Cut Foam Shapes
Remove the cover from a memory foam pillow. Use sharp scissors to cut shapes like watermelon slices, pizza wedges, hamburgers, or donuts. Refine edges for clean outlines.
One pillow makes ten to fifteen squishies, making this great for group crafting.
Paint Realistic Details
Thin fabric or acrylic paint with water. Apply base colors first, then add details like seeds, cheese, or crust.
Best paint: Crayola fabric paint stays flexible and doesn’t crack. Let dry overnight on wax paper before handling.
Customize with glitter, puff paint, or scented markers for extra flair.
Cotton-Ball and Shampoo Squishy
This budget-friendly method uses household items to make soft, slow-rebound squishies quickly.
Soak Cotton in Shampoo
Tear ten to fifteen cotton balls into loose fibers. Soak them in thick shampoo until fully saturated. Add food coloring for color.
Better alternative: Use conditioner instead of shampoo because it’s smoother and less sticky.
Shape and Wrap
Squeeze out excess liquid. Form into a ball or shape like a blueberry or dumpling. Wrap tightly in three to four layers of plastic wrap, sealing all edges.
Optional: Add a paper crown or draw details with markers. Note that these squishies may dry out in a few days, so they’re best for short-term use.
Mochi Soak Edible Squishy
Yes, you can make a squishy toy you can actually eat. This method uses real mochi rice cakes for a stretchy, juicy texture.
Soak Mochi for 24 Hours
Wash a mochi rice cake to remove surface starch. Soak it in warm, not hot, water for twenty-four hours. Remove and pat dry.
Best flavor: Corn or strawberry mochi becomes extra gelatinous after soaking.
Stretch and Play
Knead and stretch the mochi by hand for five to ten minutes. It will develop a bouncy, slow-rising texture just like a commercial squishy.
Fully edible and safe for taste exploration, but not for those with rice allergies. Store in an airtight container and use within two to three days.
Paper-Based Craft Squishy
Zero-cost and kid-friendly, this method turns paper into fun, fidget-friendly squishies.
Build a Butter Box
Sketch a rectangular prism template approximately fifty-three centimeters in perimeter. Fold paper into a box shape. Tape all seams securely.
Pro tip: Use printable templates like panda or Santa for themed squishies.
Stuff and Decorate
Fill with crumpled plastic bags, foam scraps, or pillow filling. Use scissors to push stuffing into corners. Seal the opening with tape.
Color with markers: “BUTTER,” “4 oz,” “113 g” for a realistic look. This method is great for classrooms because it encourages creativity, fine motor skills, and recycling.
Failed Methods to Avoid
Not all DIY squishy ideas work. Save time and materials by avoiding these tested failures.
Glue-Stick Method
Crushed glue sticks either turn sticky like lipstick or dry out and crack. Results are inconsistent and unreliable.
Verdict: Zero out of ten. Do not attempt.
Paint and Vaseline Method
Mixing paint with Vaseline creates a fluffy, cotton-like texture that never solidifies. It won’t squish or rebound.
Verdict: No structural integrity. Complete failure.
Water, Primer, and Glue
This mixture stays liquid and forms puddles instead of a gel. No polymerization occurs.
Verdict: Does not work. Skip entirely.
Troubleshooting Common Problems
Fix issues fast with these quick solutions.
| Problem | Solution |
|---|---|
| Balloon leaks | Double-tie or use thicker balloons |
| Clay cracks | Roll thinner and dry slowly |
| Paint runs | Blot brush and use less water |
| Foam crumbles | Use sharp scissors and high-density foam |
| No squish | Test slime or foam type first |
| Fading color | Use fabric paint or seal with acrylic spray |
Customize Your Squishy
Make your squishy stand out with fun upgrades.
Shapes to Try
Food shapes work great, including cookies, sushi, and ice cream. Animals like cats, bunnies, and pandas are popular. Objects such as hearts, stars, and clouds are simple to create. Characters like emojis and kawaii faces are trending on social media.
Add Scent and Glow
Mix in vanilla or strawberry extract for pleasant scents. Use glow-in-the-dark paint for nighttime fun. Add jingle bells inside balloon squishies for sound.
Expressive Faces
Use Sharpie brush pens to draw sleepy eyes, blushing cheeks, sparkling tears, or open-mouth giggles. Follow viral TikTok designs for authentic results.
Safety and Child-Friendly Tips
Ensure safe crafting, especially with young kids.
Supervise Chemical Mixing
Keep Lysol, silicone, and contact-lens solution away from young children. Use only under adult supervision.
Non-toxic alternatives include paper squishies, mochi soak, and memory foam methods.
Prevent Choking Hazards
Avoid small beads or charms with toddlers. If used, seal tightly and supervise all play.
Use Safe Tools
Use child-safe scissors and non-toxic paints. Crayola products are recommended for kids.
Cleaning and Storage
Keep your squishies fresh and long-lasting.
How to Clean
Silicone squishies wash with mild soap and water. Foam squishies wipe with a damp cloth and never soak. Balloon squishies spot clean only. Mochi squishies discard after two to three days.
Proper Storage
Store in cool, dry places away from sunlight. Use zip bags or plastic containers to prevent dust accumulation.
Pro tip: Label non-edible squishies clearly, especially if they look like food.
Frequently Asked Questions About Making Squishy Toys
What is the easiest method to make a squishy toy at home?
The Lysol-activated glue method is the easiest and most popular. It uses simple materials like white school glue and Lysol spray, takes about thirty minutes total, and produces results that closely match commercial squishies.
Can I make a squishy toy without chemicals?
Yes. Paper-based craft squishies use only paper, tape, and stuffing. Memory foam carving uses foam and non-toxic paint. The mochi soak method uses only water and rice cakes. These are all chemical-free options.
How long do DIY squishies last?
Silicone A+B squishies last for years. Lysol-glue and balloon squishies last several months to a year with proper care. Cotton-shampoo and mochi squishies are short-term, lasting days to a week.
Are DIY squishies safe for children?
Paper, foam, and mochi methods are safe for kids with supervision. Lysol and silicone methods require adult supervision due to chemicals. Always label non-edible squishies clearly and avoid small parts for young children.
What can I use if I don’t have Lysol spray?
Contact-lens solution contains sodium borate and works identically as a glue activator. Liquid laundry detergent also works because it contains borate compounds.
How do I make my squishies look like the viral TikTok versions?
Use reference images from TikTok or Pinterest. Draw faces with Sharpie brush pens. Add white highlights behind black lines for contrast. Use flocking powder for fuzzy textures and add expressions like sleepy eyes or blushing cheeks.
Final Tips for Success
Making a squishy toy at home is easy, affordable, and endlessly creative. Whether you want a stretchy slime dumpling, a glossy silicone cat, or an edible mochi squishy, there’s a method that fits your skill level and materials. The Lysol-activated glue method offers the best balance of authenticity and ease, while silicone casting produces professional results for gifting. For budget crafting or classroom use, paper and foam methods deliver excellent value. Test small batches before committing to large projects, label non-edible squishies clearly, and store them in airtight containers to extend their life. With this guide, you’re ready to craft squishy toys that impress, soothe, and spark joy.