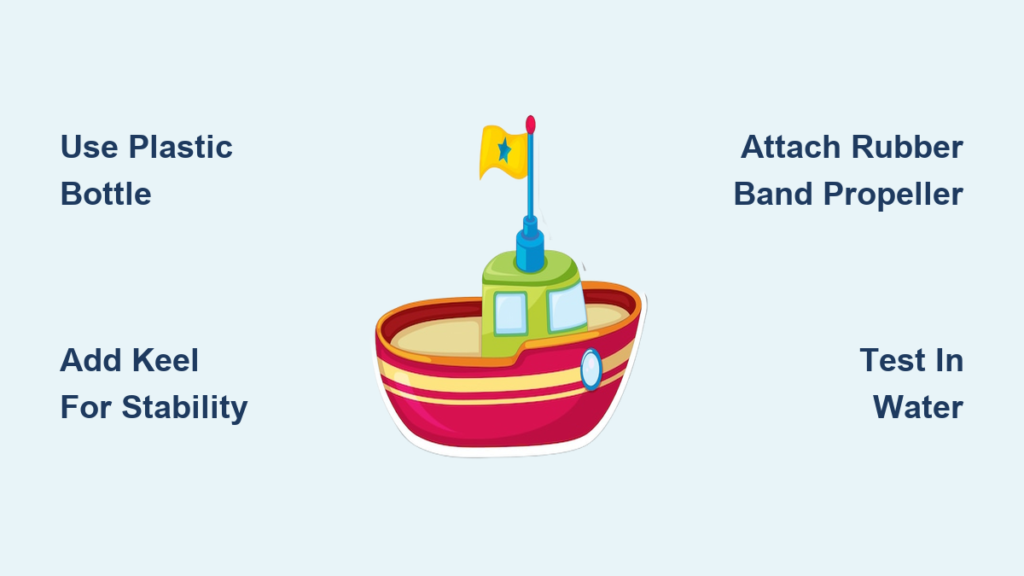
Nothing sparks a child’s curiosity like watching a handmade toy boat glide across water. Whether you’re a parent, teacher, or DIY enthusiast, learning how to make a toy boat opens the door to hands-on science, creative design, and character-building lessons all wrapped in one simple craft. From wooden rafts to rubber band-powered racers, these floating creations teach buoyancy, energy transfer, and even life skills like consistency and perseverance. In this guide, you will discover step-by-step methods using everyday materials, troubleshoot common issues, and unlock educational value in every build.
Choose Your Boat Design Based on Skill Level
Each toy boat style offers unique benefits based on age, skill level, and learning goals. Picking the right design first ensures a smoother building experience and better results.
Simple Designs for Young Children
For preschoolers and early elementary kids, start with these beginner-friendly options.
- Plastic bottle floating boat uses common household items and requires minimal tools
- Duct tape water bottle boat tolerates rough handling and wet conditions
- Both designs float reliably and teach basic buoyancy concepts
Intermediate Builds for Older Kids
School-age children can handle more complex projects with moving parts.
- Rubber band-powered popsicle stick boat introduces physics and engineering
- Wooden raft-style boat develops woodworking skills safely
- These builds require adult supervision but offer greater reward
Build a Wooden Raft-Style Toy Boat

This sturdy boat introduces basic cutting and drilling skills while creating a durable toy that lasts for years.
Cut and Shape the Hull
Use a 6-inch section of scrap 2″x4″ wood. Mark the length with a pencil, then saw it off using a hand saw or power tool. For a classic boat shape, round the front edges with a jig saw or sandpaper. Keep the bottom flat for stability in water.
Drill Key Holes
With a drill press or hand drill, create functional features.
- Use a 3/8″ bit to bore a shallow hole in the center for the mast
- Add two 7/8″ holes near the ends for peg doll seats if desired
- Set a depth stop to avoid drilling through the wood completely
Customize and Finish
Paint the boat or add a mini cabin from leftover scraps. Insert a twig or dowel into the mast hole and attach a paper sail. For play value, thread a string through a small front hole so kids can pull it across water.
Pro Tip: Make two boats, one with your child and one solo, to compare designs and boost confidence.
Create a Rubber Band-Powered Popsicle Stick Boat
This self-propelled boat teaches physics in action and thrills kids with its zip across the tub.
Build the Frame
Lay four popsicle sticks side by side to form the base. Glue two more sticks perpendicularly across the top and bottom for reinforcement. Let dry completely before handling.
Install the Propulsion System
The rubber band stores energy that propels the boat forward.
- Attach one end of a rubber band to the back of the boat with hot glue or tape
- Thread a wooden skewer through the free loop of the rubber band
- Secure the other end of the rubber band to the front of the boat
- Twist the skewer to wind the band and store energy
Attach the Propeller
Cut a four-blade propeller from cardboard. Punch a hole in the center and fix it to one end of the skewer. Ensure it spins freely without hitting the hull.
Launch and Test
Place the boat in still water. Release the skewer and watch the unwinding rubber band spin the propeller, pushing the boat forward.
Fix It: If the boat does not move, check for friction. Reduce glue buildup on the axle and ensure the propeller clears the frame.
Make a Plastic Bottle Floating Boat
This lightweight design emphasizes stability and works beautifully for teaching character lessons.
Cut the Bottle Hull
Take a clean shampoo or conditioner bottle. Use scissors to cut down one side and across the top, forming an open-top boat shape. Smooth sharp edges with sandpaper.
Add a Keel for Stability
Cut a vertical fin from leftover plastic. This is your keel. Glue it to the center of the bottle’s bottom with super glue or hot glue. The keel prevents tipping and sideways drift, just like real boats.
Make a Stiffened Sail
Cut a triangle from paper or cardstock. Punch two holes, one at the top tip and one near the base. Slide a plastic straw through both holes to keep the sail rigid.
Mount the Sail
Glue the straw upright in the center of the boat deck. Reinforce with tape if needed. Decorate the sail with markers or stickers.
Lesson Link: Write “Consistency” on the sail to teach character development. Just as the keel keeps the boat upright, strong values keep us balanced in life.
Construct a Duct Tape Water Bottle Boat
Simple, fast, and ideal for preschoolers, this version floats reliably and carries toy passengers.
Prepare the Deck
Cut a rectangle from cardboard slightly wider than two water bottles. Cover both sides completely with duct tape to make it waterproof.
Attach Floats
Place two empty water bottles side by side underneath the deck. Wrap duct tape tightly around each end to secure them. Ensure bottles are parallel and firmly attached.
Add a Sail or Fin
Cut a triangle from cardboard, cover with duct tape, and tape it upright to the deck. Use bright colors for visibility.
Test Load Capacity
Float the boat in a bathtub. Gently add small toys one at a time. Watch when it starts to tilt or sink.
Science Talk: The boat floats because it pushes aside water equal to its weight. Too much weight? It sinks.
Boost Performance and Stability
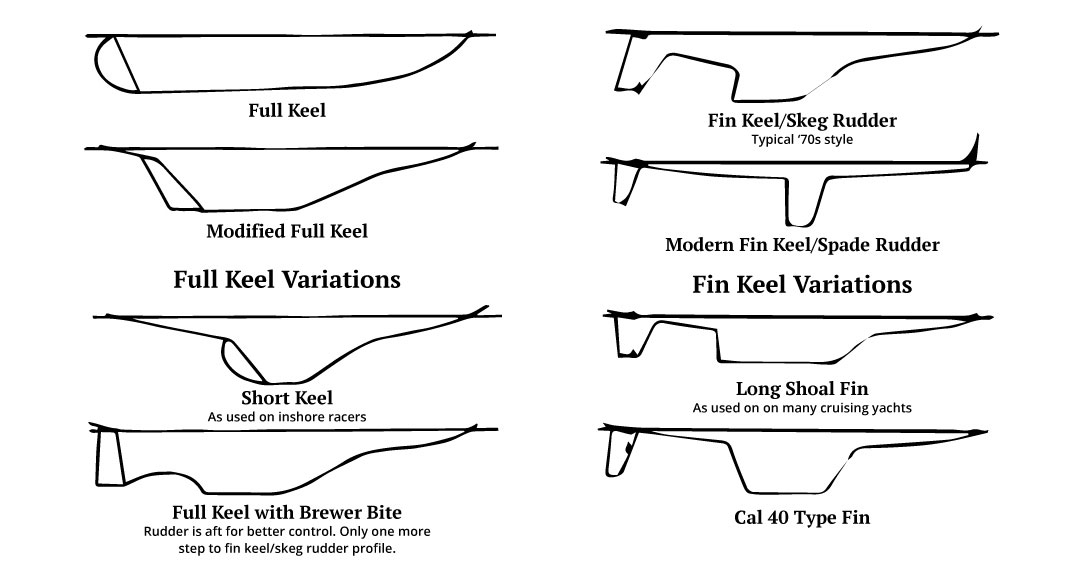
Even well-built boats can fail without proper tuning. Use these fixes to improve real-world performance.
Prevent Capsizing
A tippy boat needs better balance.
- Add a keel, a plastic fin glued to the bottom
- Widen the base using dual bottles or a broader wood platform
- Lower heavy parts by placing batteries or weights low in the hull
Improve Speed and Motion
For faster boats, try these adjustments.
- Angle the propeller blades at 30 to 45 degrees for better thrust
- Use thicker rubber bands for more power
- Streamline the hull by trimming excess material and smoothing edges
Test Tip: Try different numbers of twists in the rubber band. More twists create a faster start but shorter run.
Teach Science Through Boat Building

Turn playtime into a STEM lesson with guided exploration.
Explain Buoyancy Simply
Say: A boat floats because the water pushes up just as hard as the boat pushes down. Test it by placing the boat in water and slowly adding coins or toys. Note how far it sinks before tipping. Ask: Why did it sink? Could we make it hold more?
Demonstrate Energy Conversion
With the rubber band boat, show how stretch equals stored energy and spin equals motion. Say: When the rubber band unwinds, it turns stored energy into movement. Connect to real life by explaining that cars, bikes, and rockets all use stored energy to move.
Use Boats to Teach Life Lessons
Beyond science, boats can model emotional resilience and character development.
Teach Consistency with a Keel
Explain that a keel keeps the boat from tipping. In life, doing the right thing every day keeps us steady. Discuss what happens when we give up easily and how small choices add up over time.
Build a 52-Week Character Series
Make boat building part of a year-long lesson plan.
- Week 1: Consistency by building a keel boat
- Week 2: Patience by waiting for glue to dry and testing slowly
- Week 3: Teamwork by building with a partner
Include activities like storytelling, role-play, and I Will affirmations.
Customize and Personalize Your Boat
Make each boat unique to boost pride and engagement.
Decorate Freely
Let kids paint their boat with non-toxic colors, name it like S.S. Adventure, and add flags, pirate symbols, or rescue themes.
Add Creative Features
Try these popular upgrades.
- Mini cabin from cardboard
- Life rings made from string and beads
- LED light in waterproof case for night floats
- Pull-string for towing
Gift Idea: Let children make a boat for a sibling or friend to teach generosity and craftsmanship.
Safety First: Supervise Every Step
Even simple projects need caution during construction and play.
Handle Tools Safely
Saws and drills require adult supervision. Hot glue guns can burn, so apply glue yourself then let children decorate. Choose child-safe scissors and knives. Always wear safety goggles when cutting or drilling.
Water Safety Rules
Never leave kids unattended near water, even in a sink or tub. Use tethered boats in ponds or streams. Retrieve lost boats quickly to avoid littering.
Test in Real Water Environments
Move from the sink to the real world for exciting field tests.
Try Pond or Lake Play
Tie a string to the front of the boat. Let it float in a calm pond while holding the line. Watch how wind or currents affect movement.
Host a Boat Race
Set up a kiddie pool or shallow stream. Race multiple boats in different challenges.
- Speed challenge using wind-up rubber band models
- Load test to see who carries the most toys
- Design award for the most creative boat
Encourage redesigns by asking: What could make yours go faster next time?
Fix Common Boat Failures
Even experts face problems. Here is how to solve them fast.
Boat Sinks Immediately
Cause: Not enough buoyancy. Fix: Add more floatation by taping on extra bottles or using a larger hull.
Tips Over Easily
Cause: No keel or uneven weight. Fix: Glue on a plastic fin and balance cargo side-to-side.
Propeller Will Not Spin
Cause: Axle stuck or too much glue. Fix: Clear glue from the skewer and let it rotate freely.
Rubber Band Does Not Propel
Cause: Loose attachment or not wound enough. Fix: Re-glue front anchor and twist the propeller 10 or more times before release.
Sail Falls Down
Cause: Weak support. Fix: Use a sturdier dowel or reinforce base with tape.
Boat Drifts Sideways
Cause: Missing keel. Fix: Attach a vertical fin to the bottom center.
Glue Fails in Water
Cause: Regular glue dissolves. Fix: Use hot glue, super glue, or duct tape, all of which are water-resistant.
Final Tips for Successful Toy Boat Building
Start simple with bottle or popsicle stick boats. Let kids lead by choosing colors, names, and designs. Embrace failure as a chance to learn. Reuse materials like bottles, cardboard, and sticks for next time. Store properly by drying boats after use and keeping them in a box for repeated play.
Building a toy boat is not just about floating. It is about curiosity, creativity, and confidence. Whether you are teaching science, values, or just having fun, how to make a toy boat is a journey worth taking. Grab your materials, pick a design, and set sail.
Frequently Asked Questions About Making Toy Boats
What materials do I need to make a simple toy boat?
You can use everyday household items like plastic bottles, popsicle sticks, cardboard, duct tape, and rubber bands. More advanced builds require scrap wood, wooden dowels, and basic tools like saws and drills.
How do I make a boat that actually floats?
Ensure your boat displaces enough water by using lightweight materials and creating a hollow or buoyant hull. Adding a keel improves stability and prevents tipping. Test in shallow water first and adjust as needed.
What is the easiest toy boat for beginners?
The plastic bottle boat and duct tape water bottle boat are the easiest options. They require minimal tools, use recycled materials, and float reliably with basic construction.
How does a rubber band-powered boat work?
The rubber band stores potential energy when twisted. When released, it unwinds and spins a propeller, pushing water backward. According to Newton’s Third Law, the boat moves forward as a reaction to the propeller pushing water the opposite direction.
Can I teach my child science with toy boats?
Absolutely. Boat building teaches buoyancy, displacement, energy conversion, and engineering principles. You can demonstrate how boats float by adding weights until they sink and explain how rubber bands store and release energy.
What age is appropriate for building toy boats?
Simple bottle boats work for ages 4 to 6 with adult help. Popsicle stick boats suit ages 8 and up. Wooden raft boats require adult supervision for cutting and drilling, so they work best for ages 6 and older with guidance.