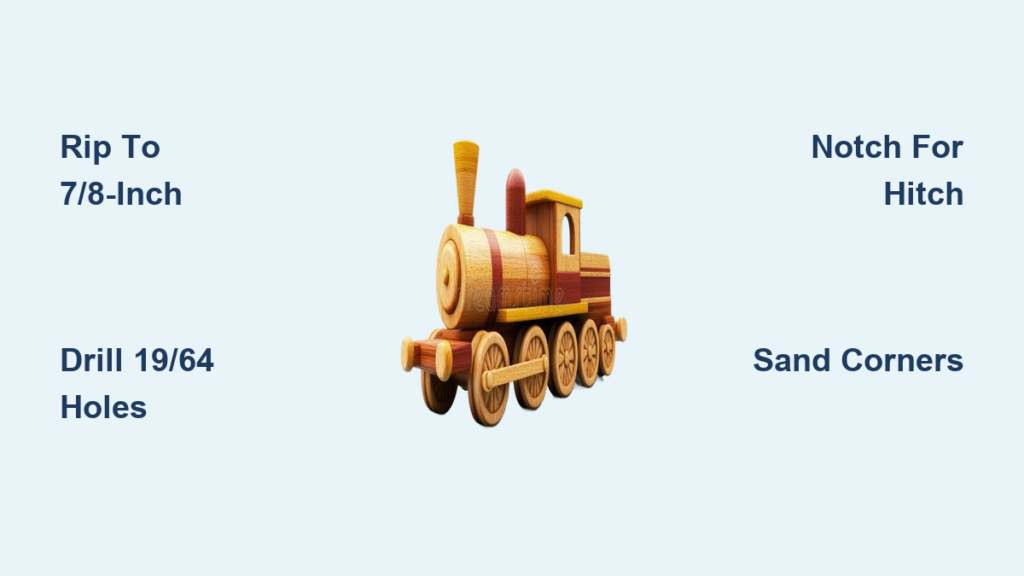
Imagine building a toy your child will treasure for years, not for its price tag, but because you created it with your own hands. A handcrafted wooden toy train becomes a family heirloom, built to withstand rough play and spark endless imaginative adventures. With basic woodworking tools, scrap lumber, and precise techniques, you can create a smooth-rolling, customizable train set that connects seamlessly with standard wooden railway tracks.
This guide walks you through every step of how to make a wooden toy train from scratch. You’ll learn how to cut wheelbase blanks, drill axle holes, install hitches, and finish durable, child-safe cars including the engine, coal car, and caboose. Whether you’re building a gift, a family project, or expanding your workshop skills, these methods ensure accuracy and real-world performance.
Gather Materials and Tools for Your Train Project
Before starting your build, collect all necessary materials and ensure your workshop is equipped for precision work. Having everything ready prevents interruptions and ensures consistent results across all train cars.
Essential Lumber and Components
You will need standard dimensional lumber for the bases. Use 2×4, 2×6, or 2×8 boards, which typically surface to about 1½ inches thick. Rip these to 7/8-inch thickness for ideal wheelbase strength. Additional components include ¼-inch wooden dowels for axles, pre-made 1¼-inch wooden wheels, ¼-inch hitch pegs, and small washers for wheel security.
Required Tools
Your tool setup should include a table saw for ripping and squaring lumber, a band saw for notches and curves, a drill press for perpendicular holes, and precision drill bits (19/64-inch for axles, 15/64-inch for hitches). A miter saw handles angled cuts like the cowcatcher, while a saber saw rounds corners and shapes contours. Have templates and stop blocks ready for repeatable cuts.
Cut and Prepare Wheelbase Blanks
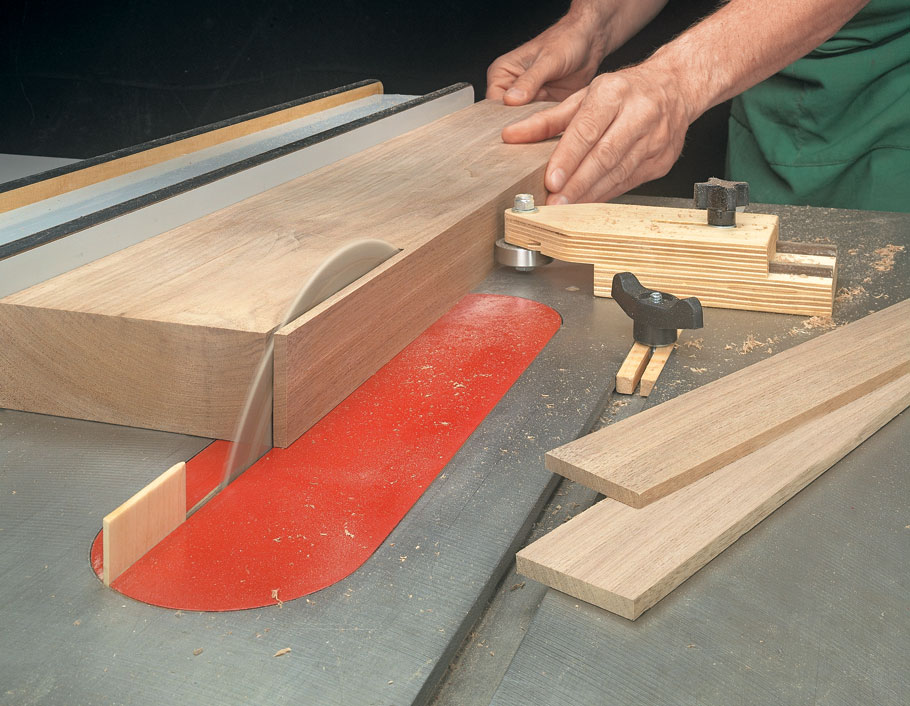
Uniform wheelbase blanks ensure all your train cars connect properly and roll smoothly together. This foundational step sets the stage for every car in your fleet.
Rip Lumber to 7/8-Inch Thickness
Start by squaring one edge of your dimensional lumber on the table saw for clean, straight reference cuts. Adjust the saw fence and rip boards to 7/8-inch thickness. From a standard 2×6, you can rip three such pieces. If using hardwood offcuts, plane them to consistent thickness for interchangeability across your train set.
Cut Blanks to Standard Lengths
Cut your blanks to these standard lengths using a miter saw or crosscut sled for square, repeatable results. The engine and coal car bases measure 6 inches long. The caboose base measures 5 inches long. All bases share approximately 3.5 inches width for consistent track compatibility. Label each blank by car type to avoid confusion during assembly.
Pro Tip: Make extra blanks. Mistakes happen, and having spares saves significant time during the build process.
Shape the Engine Base with Cowcatcher and Hitch
The locomotive defines your train’s character. Its angled front and rear hitch connection create the classic toy train appearance while ensuring smooth operation.
Cut the 45° Cowcatcher Front
Set your miter saw to 45 degrees and cut the front end of the engine base for that iconic cowcatcher look. For greater control, use a band saw with a miter sled. Cut from both sides to minimize tear-out and achieve clean edges. This angled nose improves visual appeal and helps the train navigate curves smoothly.
Notch the Rear for Hitch Connection
At the rear of the engine base, cut a 1-inch deep notch centered across the width. Use a ¼-inch wide band saw blade guided by a template and stop block for precision. Flip the piece and repeat the cut from the opposite side to ensure symmetry. This creates a U-shaped recess for the next car to attach.
Create Top-Only Recess for Hitch
Cut a 1-inch long recess on both top and bottom faces at the notch location, but retain only the top piece. This allows the ¼-inch hitch peg to sit flush on top without protruding below. Achieve this with careful band saw work followed by chisel cleanup. When complete, the hitch peg should lie flat without catching on the bottom surface.
Build the Coal Car with Dual-Sided Connections
The coal car bridges your engine and remaining cars, requiring connection capability from either end for versatile play options.
Cut Opposite End Notches
Cut a 1-inch notch on both ends of the coal car base, but stagger them opposite each other. One end has the notch on top, the other on bottom. This ensures the car can couple in any orientation while maintaining level alignment when connected front-to-back. Use the same template and stop block as the engine for consistency.
Retain Both Top and Bottom Recesses
Unlike the engine, retain both top and bottom recessed sections at each notch. This dual-sided design allows hitch connections from either end and supports smooth pivoting between cars. This versatility means kids can flip the car and still connect it without frustration.
Why It Matters: This design lets children arrange cars in any order without worrying about orientation.
Create the Caboose with Rear Hitch
The caboose brings up the rear of your train and needs only one hitch point for connection to the rest of the fleet.
Cut Single Rear Hitch Notch
On one end only, cut a 1-inch notch using the same method and template as the engine. Align carefully for uniformity. Keep only the top recess, matching the engine configuration. Leave the front unmodified for clean, finished lines.
Round All Corners for Safety
Use a saber saw to gently round all four corners of the caboose base. Follow light pencil marks for consistency, aiming for approximately ½-inch radius on each corner. Sand thoroughly afterward for a smooth, splinter-free finish. This softens the appearance and eliminates sharp edges that could cause splinters during play.
Drill Precise Axle Holes for Smooth Rolling
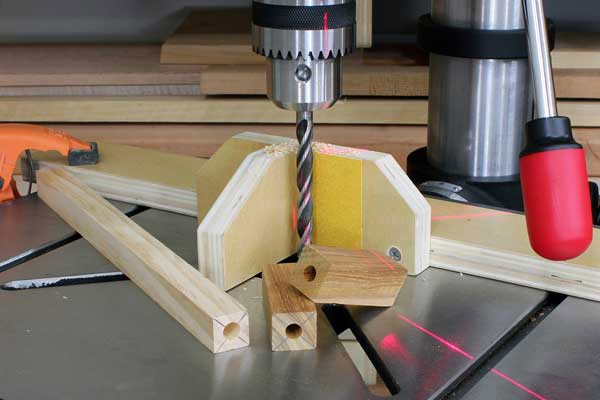
Accurate hole placement determines whether your train rolls smoothly or wobbles dangerously. Precision here pays dividends in play quality.
Use 19/64-Inch Drill Bit
For ¼-inch dowel axles, drill with a 19/64-inch bit. This provides a tight enough fit for secure installation while remaining loose enough for easy insertion. Using too small a bit risks splitting the wood, while too large creates wobbly wheels. Use a drill press for perfect perpendicularity and clamp the base firmly to prevent movement.
Position Holes Toward Bottom Edge
Do not center holes vertically. Instead, place them closer to the bottom of the block, typically ¼ to ³⁄8 inch from the bottom edge. This positioning provides ground clearance for undercarriage details and prevents wheel rub on rails or flooring. It also leaves room for hitch pegs and coupler mechanisms.
Drill Correct Number of Holes
The engine requires 3 axle holes for its three-wheel truck configuration. Coal cars, caboose, and cargo cars each need 2 axle holes for standard two-axle design. Mark hole centers with a square and pencil before drilling to ensure proper spacing and alignment.
Expert Note: Misaligned holes cause binding and premature wear. Always double-check spacing and squareness before drilling.
Install Hitch Alignment Points
Secure hitch connections start with precisely located center holes. This step ensures cars connect firmly yet pivot freely.
Find Center Using Diagonal X Method
To locate the hitch hole accurately, draw diagonals from corner to corner on the hitch notch face. The intersection point marks the exact center. Mark this intersection with a punch or awl to prevent bit drift when drilling. This method works without measuring and guarantees accuracy every time.
Drill 15/64-Inch Center Hole
Use a 15/64-inch drill bit to create a pilot hole for the ¼-inch hitch peg. Drill to approximately ½-inch depth, keeping the bit straight. Angled holes reduce stability and cause connection problems. Clean out all debris before inserting the peg.
Round and Sand Bases for Safety
Final shaping transforms rough blanks into smooth, child-safe components ready for assembly and finishing.
Round Corners with Saber Saw
After notching and drilling, use a jigsaw to round all four corners of each base. Cut just outside your pencil line, then finish with sanding for clean curves. Avoid over-rounding, as you must maintain enough surface area for structural integrity and wheel clearance.
Sand Through Progressive Grits
Start with 120 to 150 grit sandpaper to remove tool marks and pencil lines. Progress to 220 grit for a silky-smooth finish. Round all edges slightly to break sharpness, paying extra attention to high-touch areas like ends and tops. Run your fingers over every surface after sanding. If it feels rough, keep sanding.
Assemble Train Body Details
The wheelbase rolls, but the body brings your train to life. Adding structural elements creates realistic, eye-catching train cars.
Attach Cab to Engine
Cut a simple wooden cab from ¾-inch stock using a jigsaw or band saw. Shape it to complement your engine design, then glue it to the rear or mid-section of the engine base. Reinforce with small brad nails or tiny screws if needed. Ensure the cab doesn’t interfere with hitch operation.
Add Roof and Windows
Use thin wood (¼ inch or less) for roof panels, window frames, and door details. Glue components into place or set them into shallow rabbets for clean joints. For added realism, inset acrylic window pieces or paint window outlines directly on the body.
Install Cargo Elements
Customize each car type with appropriate cargo details. The coal car works well with small wood blocks or painted pebbles glued in place. Log cars feature dowel rods arranged side-by-side. Tank cars mount a wooden cylinder along the top. Flatbed cars hold crates made from scrap wood. Let creativity guide your additions.
Mount Wheels and Axles
Now your train becomes mobile. Proper wheel and axle installation determines rolling performance.
Insert ¼-Inch Dowel Axles
Cut ¼-inch wooden or metal dowels to the width of the car base plus wheel thickness. Push them through the drilled holes, ensuring axles turn freely without being loose. Trim any excess length as needed. Wood axles provide a softer, quieter ride, while metal offers superior durability.
Secure with Washers
Slide a small washer onto each end of the axle after installing wheels. This prevents lateral wheel movement, reduces wobble, and keeps wheels aligned. Only glue washers in place if necessary for maintenance reasons. Leaving them removable simplifies future repairs.
Test Wheel Spin and Clearance
Spin each wheel by hand after installation. Wheels should rotate smoothly without binding. Check for contact with the base or track. If wheels rub, adjust hole alignment or sand slightly as needed. Apply a tiny drop of furniture wax to axles for smoother rolling.
Paint and Finish Your Wooden Train
Color transforms your creation into something magical while protecting the wood from wear.
Choose Child-Safe Finishes
Use non-toxic, water-based paints or natural wood stains. Classic color schemes include red engines, green cabooses, and black coal cars. Let children pick colors for personalized gifts. Always verify that paints meet safety standards before use on toys.
Add Hand-Painted Details
Use fine brushes to add numbers, logos, or decorative stripes. Simple details like “5” on the engine or “Big Little Railway” lettering elevate your train from simple craft to professional-looking toy. These touches make the finished piece truly special.
Seal with Protective Topcoat
Apply child-safe clear finish such as water-based polyurethane, lacquer, or a beeswax and mineral oil blend. Apply 2 to 3 light coats, sanding lightly between layers for lasting protection. Allow at least 24 to 48 hours of cure time before giving the train to children to ensure all fumes dissipate completely.
Expand Your Train Collection
Master the basics and expand into a full fleet. The standardized wheelbase system allows endless customization.
Build Standardized Car Types
All cars share the same 3.5-inch wide by 7/8-inch thick base, ensuring interchangeability across your collection. Popular designs include gondolas, boxcars, passenger cars, tank cars, center-beam cars, flatbeds, and log cars. Use digital plans for accurate templates and 3D views of each design.
Mix and Match Configurations
Children can rearrange cars into new orders, play freight loader with different cargo types, or connect to other wooden railway systems like Brio or Thomas. Label car types with painted letters on the sides for easy identification during play.
Troubleshoot Common Issues
Even careful builds encounter problems. Address these common issues quickly to keep your train running smoothly.
Wheels Won’t Spin Freely
Cause: Holes too tight or misaligned. Fix: Ream slightly with a larger drill bit, or realign holes if necessary.
Train Derails on Curves
Cause: Overhang or stiff hitch. Fix: Shorten body length, round front corners, or lubricate hitch peg.
Hitches Won’t Connect
Cause: Misaligned center holes. Fix: Redrill using the diagonal X method, or sand edges of notch for clearance.
Wobbly Axles
Cause: Loose fit or uneven wheels. Fix: Wrap axle with tape before insertion, or replace warped wheels.
Quick Test: Roll your train down a slight incline. It should track straight and smooth.
Key Takeaways for Building Your Wooden Toy Train
You now have everything needed to make a wooden toy train that rolls smoothly, connects securely, and withstands years of play. Start with the engine, coal car, and caboose to master the standardized wheelbase system. Focus on precise axle hole placement and hitch alignment for smooth operation. Expand into additional car types as your skills develop.
This project creates lasting memories. Every sanded edge, painted stripe, and clicking hitch carries the pride of handmade craftsmanship. When your child lines up the cars and says “Look what you made,” you’ll know every cut and sanding session was worth the effort.
So gather your tools, select your lumber, and start building. The first train is always the hardest. The next dozen will roll right off your workbench and into hours of imaginative play.
Frequently Asked Questions About Making a Wooden Toy Train
What type of wood is best for a wooden toy train?
Hardwoods like maple, cherry, or walnut work best for durability and appearance. However, standard dimensional lumber (2×4, 2×6, 2×8) surfaced to 7/8-inch thickness provides an excellent beginner-friendly option that performs well and costs less.
How do I ensure the wheels spin smoothly?
Precise hole drilling is essential. Use a 19/64-inch drill bit for ¼-inch axles, position holes slightly below center toward the bottom edge, and ensure all holes are perpendicular. Test each wheel by hand before final assembly.
Can I connect my train to Brio or Thomas wooden tracks?
Yes. Most wooden toy trains use standard 1¾-inch track gauge and 3.5-inch wheelbase width, making them compatible with Brio, Melissa & Doug, and other major wooden railway systems. Test fit before finishing if compatibility is important.
What age is appropriate for a homemade wooden toy train?
Finished trains without small detachable parts are safe for children ages 3 and up. If building for younger children, avoid tiny cargo pieces, acrylic windows, and magnetic couplers that could pose choking hazards.
How long does it take to build a complete train set?
A basic 3-car set (engine, coal car, caboose) typically takes 4 to 6 hours for an experienced hobbyist. Beginners should budget 8 to 12 hours including learning time and finishing cure time.