You open your child’s favorite toy, only to find a white, crusty substance oozing from the battery compartment. This common problem affects remote-controlled cars, talking dolls, vintage Furbies, and other battery-operated toys that have been sitting unused. The culprit is leaking alkaline batteries releasing potassium hydroxide, which reacts with air to form corrosive residue. Learning how to clean battery corrosion in a toy can save your child’s beloved gadget and restore electrical contact.
This guide walks you through every step, from safe battery removal to neutralizing residue, scrubbing contacts, and preventing future leaks. You’ll discover which household items work effectively, which to avoid, and how to protect delicate electronics in both vintage and modern toys.
Safety First: Protect Yourself Before Cleaning
Wear Protective Gear
Always wear nitrile gloves and safety glasses before touching corroded battery compartments. The white or blue-green crust is often potassium carbonate, a byproduct of leaked potassium hydroxide that can irritate skin and eyes. Even dry residue becomes caustic when exposed to moisture. Gloves prevent chemical exposure, while safety glasses shield your eyes from flying particles during scrubbing.
Work in a Ventilated Area
Perform cleaning in a well-ventilated space to avoid inhaling fumes, especially when using vinegar or CLR. Lay down paper towels or a disposable mat to catch debris and simplify cleanup. Keep children and pets away from your workspace, as leaking batteries and cleaning solutions are hazardous.
Use Plastic Tools Only
Avoid metal screwdrivers or tweezers when removing stuck batteries or scraping corrosion. Metal can short-circuit electronics or damage delicate contacts. Instead, use plastic or wooden tools like popsicle sticks, plastic spoons, or non-conductive tipped tools to gently pry out batteries and lift residue.
Removing Leaking Batteries from the Toy
Open the Battery Compartment
Use a plastic or non-metallic tool to open the battery door. If screws are present, use a plastic-handled screwdriver to prevent accidental shorts. Work slowly, as aged plastic can crack easily, especially in vintage toys.
Extract Stuck Batteries Carefully
If batteries are jammed, gently wiggle them loose with a plastic tool. Never force or hammer them, as this can rupture the battery and spread more corrosive material. Never use your fingers, as residue can burn skin on contact. Once removed, place all batteries, including non-leaking ones, into a sealed plastic bag.
Dispose of Batteries Properly
Take the sealed bag to a battery recycling center, electronics retailer, or municipal hazardous waste drop-off. Never throw leaking batteries in regular trash. Check local regulations, as many areas prohibit battery disposal in landfills due to heavy metals like cadmium and lead.
Neutralizing Corrosion with Household Acids

Apply White Vinegar to Corroded Terminals
White vinegar, containing 5% acetic acid, is the most effective household cleaner for alkaline corrosion. Pour a small amount into a bowl and soak a cotton swab or soft toothbrush. Apply directly to the corroded contacts and watch for fizzing or sizzling, which confirms the acid-base reaction neutralizing the potassium hydroxide. Let it sit for one to two minutes to dissolve residue, then reapply as needed for heavy buildup.
Try Lemon Juice as an Alternative
If vinegar is unavailable, lemon juice works similarly due to its citric acid content. It is less concentrated, so allow two to three minutes of dwell time. Apply with a cotton swab and scrub gently. While effective, lemon juice may leave a sticky film if not rinsed properly, so follow with alcohol.
Use Baking Soda Paste for Stubborn Corrosion
For stubborn corrosion, mix one tablespoon of baking soda with a few drops of water or vinegar to form a thick paste. Dip a clean swab into the paste and rub it onto the terminals. Baking soda acts as a mild abrasive, helping lift residue without damaging metal. Always follow with isopropyl alcohol to prevent conductive residue from remaining.
Try CLR for Heavy Buildup
For extreme corrosion, CLR can dissolve mineral deposits. Apply a small amount directly to the residue and wait 30 to 60 seconds. Scrub gently with a toothbrush, then immediately follow with isopropyl alcohol to remove chemical traces. CLR is strong, so use it sparingly and avoid contact with plastic or circuit boards.
Scrubbing Away Stubborn Residue
Use a Soft Toothbrush or Paintbrush
After applying vinegar or paste, gently scrub the contacts with a clean, soft-bristled toothbrush or fine-tip paintbrush. Replace swabs frequently, as they absorb corrosive material and lose effectiveness. Focus on corners and under springs where corrosion hides. Use a plastic tool to lift caked-on residue without scratching metal.
Scrape Heavy Buildup Carefully
For thick, crusty deposits, use a diamond-coated needle file for precision scraping. A non-metallic screwdriver can help lift residue, but apply minimal pressure. Avoid metal tools, as scratches can reduce conductivity and damage solder joints.
Skip the Pencil Eraser Myth
A common myth suggests a pencil eraser cleans battery corrosion. While it works for light oxidation on contacts, it is ineffective on actual corrosion. Save the eraser for final polishing only after all residue has been removed.
Final Clean with Isopropyl Alcohol
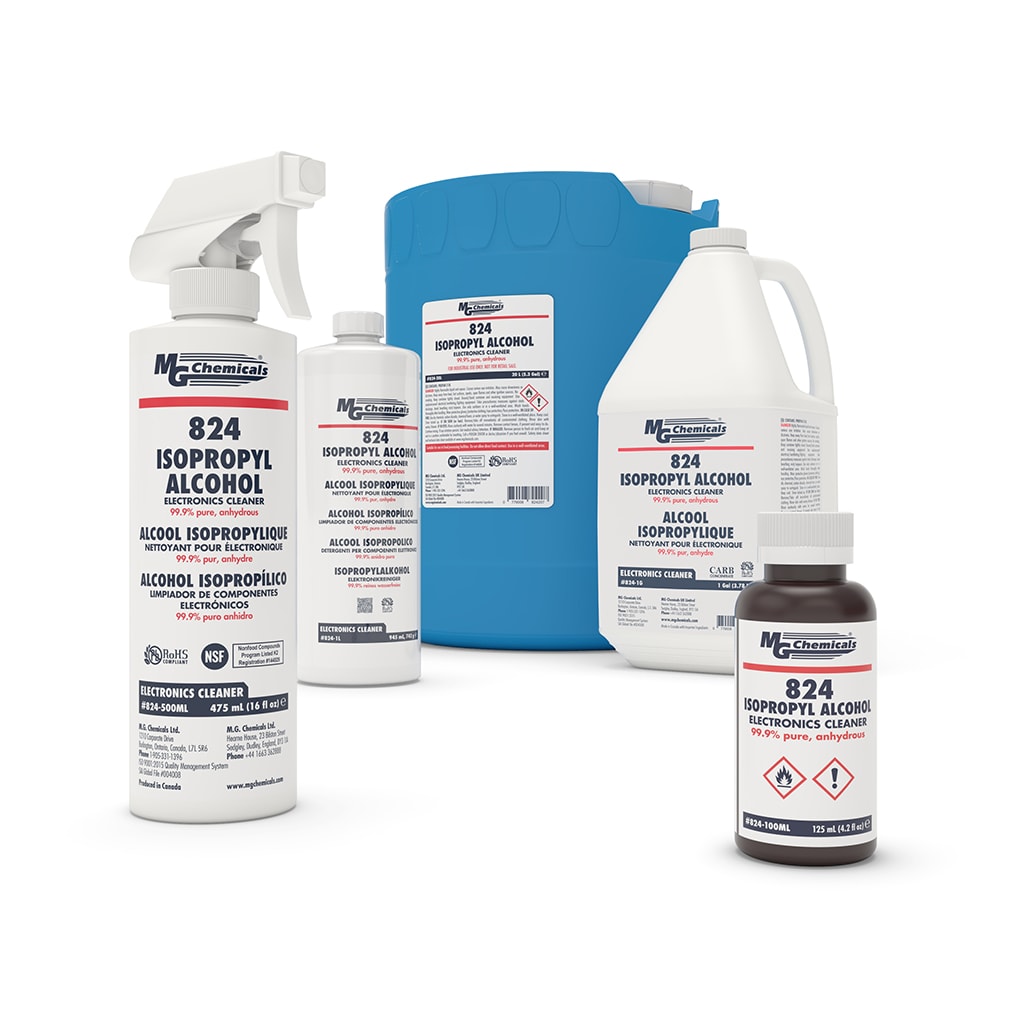
Wipe with 90%+ Isopropyl Alcohol
After neutralizing and scrubbing, wipe all cleaned areas with 90% or higher isopropyl alcohol. Soak a cotton swab or lint-free cloth and thoroughly clean the terminals. IPA displaces moisture, evaporates quickly, leaves no residue, disinfects surfaces, and is non-conductive. Remember, rubbing alcohol does not neutralize corrosion, but it is essential for the final clean.
Rinse with Sterile Water (Optional)
If you used vinegar, baking soda, or CLR, rinse with sterile water to remove salt byproducts. Use distilled water or water that has been boiled and cooled. Never use tap water, as minerals can promote future corrosion. Apply only via swab, and do not soak the toy.
Drying and Polishing the Contacts
Air-Dry Completely
Wipe dry with a lint-free microfiber cloth. Leave the battery compartment open and let it air-dry in a dry, ventilated area for at least one hour. For severe cases, dry overnight. Ensure no moisture remains before inserting new batteries, as water can cause short circuits.
Polish with a Pencil Eraser
For final shine and improved conductivity, gently rub metal contacts with a clean pencil eraser. This removes thin oxidation layers and improves contact. Wipe away rubber debris with a dry swab.
Applying Protective Coating
Use WD-40 or Petroleum Jelly
To prevent future corrosion, apply a thin layer of WD-40 or petroleum jelly to the metal terminals. WD-40 creates a moisture-resistant barrier, while petroleum jelly is non-conductive and safe on contacts. Apply only to metal terminals, not surrounding electronics. Let WD-40 sit and dry overnight before inserting batteries.
Testing the Toy After Cleaning
Insert Fresh Batteries
Use new, high-quality batteries of the correct type. Never mix old and new batteries, different brands, or alkaline with rechargeable batteries. Ensure proper polarity matches the compartment markings.
Power On and Test
Turn on the toy. If it does not work, re-inspect for hidden corrosion under springs or in corners. Check for damaged wires or cracked circuit traces. Try another set of batteries. Many toys revive immediately after cleaning, while others may need deeper repair if corrosion damaged internal circuits.
Preventing Future Battery Corrosion
Remove Batteries During Storage
Always remove batteries from toys not used for 30 or more days, especially seasonal or gift toys. Even fresh batteries can leak over time. Store spare batteries in a cool, dry place, and do not refrigerate them, as condensation increases leakage risk.
Apply Terminal Protector
Before inserting batteries, apply a tiny amount of petroleum jelly to the contacts. This prevents oxidation and moisture buildup. Inspect frequently used toys every three to six months for discoloration, swelling, odor, or reduced performance.
Proper Disposal of Corroded Batteries
Seal and Label Leaking Batteries
Place all removed batteries in a sealed plastic bag and label it “Leaking Batteries – Hazardous” to prevent accidental handling. Take bags to battery recycling kiosks, retail drop-offs, or local hazardous waste events. Batteries contain toxic chemicals that can pollute soil and water if improperly disposed of.
Frequently Asked Questions About Cleaning Battery Corrosion in a Toy
How long does it take to clean battery corrosion in a toy?
Active cleaning takes about 10 to 15 minutes, plus at least one hour of drying time. For severe cases, allow overnight drying. The total process typically takes 1.5 to 2 hours.
What household items dissolve battery corrosion?
White vinegar and lemon juice dissolve alkaline corrosion through acid-base reactions. Baking soda paste helps scrub away stubborn residue. CLR is effective for heavy mineral deposits but requires thorough follow-up cleaning.
Can I use Coca-Cola to clean battery corrosion?
Not recommended. While cola contains phosphoric acid that can neutralize corrosion, the sugar and additives leave sticky residues that attract dirt and promote future corrosion. Stick to vinegar, baking soda, or alcohol for reliable results.
Does battery corrosion permanently ruin toys?
Not always. If caught early and cleaned properly, most toys can be restored to full functionality. Severe or prolonged exposure may cause permanent damage to circuits or wiring.
How often should I check toys for battery corrosion?
Check every three to six months for regularly used toys. Inspect immediately if a toy stops working, emits an odor, or shows discoloration around the battery compartment.
Can I reuse a toy after cleaning battery corrosion?
Yes, most toys function normally after proper cleaning. Insert fresh batteries and test the toy. If it does not work, inspect for hidden corrosion or internal damage that may require professional repair.
Key Takeaways for Cleaning Battery Corrosion in Toys
Cleaning battery corrosion in a toy is a straightforward process that requires household items like white vinegar, baking soda, and isopropyl alcohol. Always prioritize safety by wearing gloves and safety glasses, working in ventilated areas, and using plastic tools instead of metal. Neutralize corrosion with vinegar or lemon juice, scrub gently with a soft toothbrush, and finish with 90%+ isopropyl alcohol to ensure no residue remains.
Allow thorough drying time of at least one hour before inserting fresh batteries. Apply a thin layer of petroleum jelly or WD-40 to metal contacts to prevent future corrosion. Remove batteries from toys that will sit unused for more than 30 days, and inspect frequently used toys every three to six months. By following these steps, you can rescue broken electronics, save money on replacements, and keep your child’s favorite toys running.