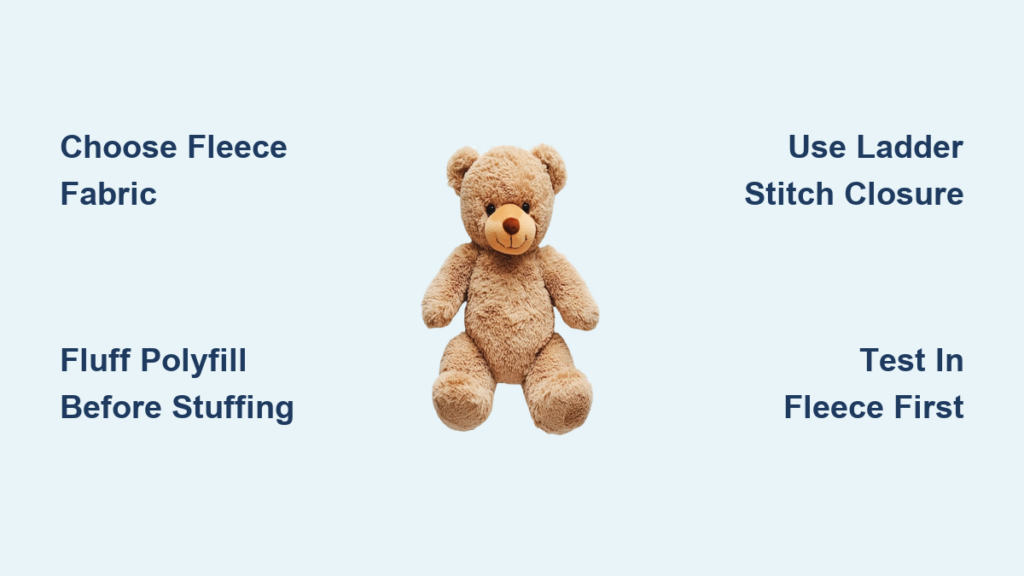
Every child has that toy, the one dragged everywhere, whispered secrets to at bedtime, and hugged through tears. When it tears, loses a limb, or gets chewed by the dog, it is more than fabric and stuffing. It is a piece of their emotional world. Plush toy repair is not just sewing. It is emotional restoration. Whether you are facing a dog-mauled bunny, a threadbare bear from childhood, or a seam split from decades of love, this guide shows you how to bring your cherished stuffed animal back to life, either with your own hands or through expert help.
Professionals across the United States and beyond now specialize in plush repair, offering mail-in clinics, memory bear creation, and even Netflix-featured restorations. But not every tear needs a pro. With the right stitches, tools, and mindset, many repairs can be done at home, quickly, affordably, and with deep emotional care. This guide covers everything from DIY emergency fixes to choosing top-rated repair services, understanding damage types, and preserving sentimental value for generations.
Decode Common Plush Damage Types
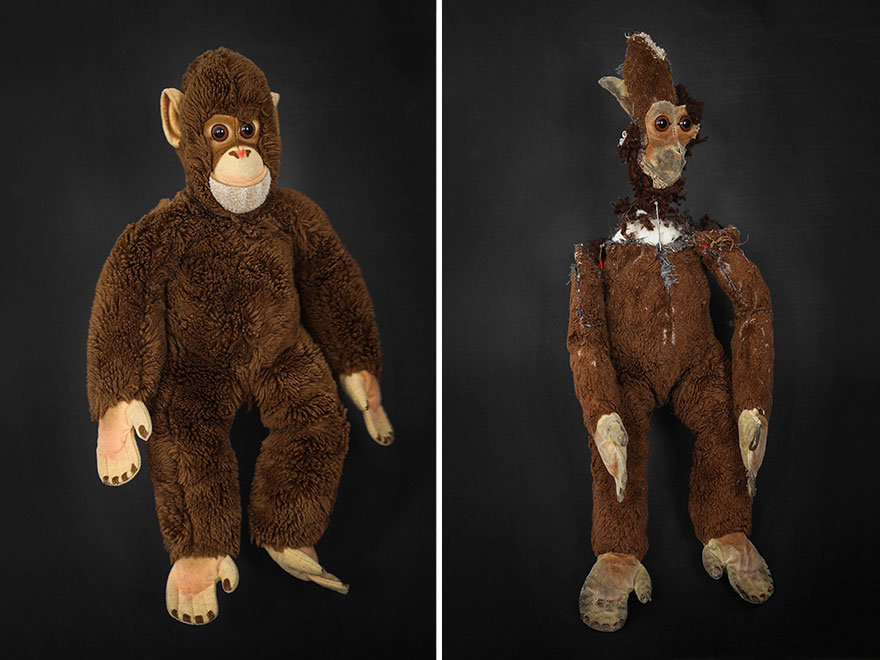
Understanding what happened to your stuffed animal is the first step toward fixing it. Different causes require different approaches, and identifying the damage type helps you decide whether to grab a needle or ship it to a professional.
Pet Chewing and Scratching
Dogs and cats do not discriminate. Beloved stuffies often become chew toys, and damage ranges from small punctures to missing limbs, shredded faces, or complete stuffing destruction. Some clinics, like the Stuffed Animal Clinic of Madison, specifically advertise pet-loved toy repair, recognizing both child and pet attachments.
What to look for includes torn seams or gaping holes, missing facial features like eyes or nose, matted or missing fur around the mouth, and cases where the toy has been gutted but the shell remains intact. Even if the toy looks destroyed, professionals can often reconstruct it using archival photos or original fabric remnants.
Washing Machine Accidents
Accidentally tossing a plush into the wash, especially in hot water or the dryer, can be devastating. Heat causes fur to mat, stuffing to clump, and seams to burst.
Common outcomes include shrunken or misshapen body, hardened and compacted stuffing, faded or bleeding fabric, and structural collapse with limp limbs. If washed, air-dry immediately. Never use heat. Gently brush out matted fur with a pet slicker brush.
Long-Term Storage Damage
Toys stored in attics, basements, or boxes for years may suffer from moth or insect damage with holes in fabric, mold or mildew causing musty smell and discoloration, and brittle stuffing or cracked seams. Look for powdery residue indicating moth droppings or soft spots in fabric. Do not attempt DIY repair on moldy toys. Professional deep cleaning is required.
Wear and Tear from Love
Decades of hugs, drags, and sleepovers cause predictable stress points. Split seams appear at arms, legs, and necks. Ears and tails become detached. Fabric thins on knees, elbows, and face. Stuffing is lost, leading to sagging. Regular inspection can catch small tears before they become major repairs.
When to Repair vs. Replace
Not every damaged toy is worth saving, and not every one needs replacing. Knowing the difference saves money and emotional disappointment.
Save It: High Emotional Value
Consider repair for toys that are 20 or more years old, gifts from deceased relatives, passed through generations, or tied to major life events like birthdays, trips, or milestones. Services like Fluff Restoration and Secaucus Doll and Teddy Bear Hospital specialize in heirloom-level repairs, often using original materials and archival references.
Replace: Low Sentiment, High Risk
Consider replacement if the toy is mass-produced with no unique features, has mold that cannot be removed, poses a choking hazard with loose buttons or exposed wire, or would require unsafe materials for DIY repair. Never repair a toy with broken plastic pellets or foam chunks. These are ingestion risks for young children.
DIY Stuffed Animal Repair: Step-by-Step Fixes
Many minor repairs can be done at home with basic tools and patience. The key is working slowly and keeping your stitches hidden in the fur.
Essential Tools for Home Repair
You need sharp fabric scissors, a medium-length hand-sewing needle, all-purpose polyester thread color-matched or contrasting, pearl cotton for facial features, an air-soluble fabric marker or pins, a small patch of matching fabric, and a needle threader for beginners. Use thicker thread like upholstery thread for high-stress areas such as limbs.
Reattach a Loose Limb
This technique works best for arms, legs, ears, and tails. The stitch used is ladder stitch for invisible closure, with running stitch for initial anchoring.
Steps include locating the original seam using the opposite limb as a guide, double-threading your needle and knotting the end, starting from the inside of the body and emerging near the attachment point, using a running stitch around the limb base to anchor it, switching to ladder stitch as the opening narrows by inserting the needle into one side then the other and pulling gently to close the gap, and finishing with 3 to 4 locking stitches before burying the thread end in stuffing. The limb should move slightly but stay firmly attached.
Close a Seam or Small Hole
Best for split seams and belly openings, the ladder stitch works here too.
Steps include aligning the two fabric edges, inserting the needle into the fold of one side then the other, pulling the thread gently after each stitch to draw edges together, continuing until closed, then knotting and burying the thread inside stuffing. Work slowly. Rushing causes puckering.
Patch a Large Hole
Best for missing fabric and chewed sections, this uses whip stitch for edges and baseball stitch for straight tears.
Steps include cutting a patch slightly larger than the hole, placing it under the damaged area, using a whip stitch around the edge by looping thread over the fabric edge from front to back, using a baseball stitch for straight tears by overlapping edges slightly and crisscrossing through both layers, and choosing decorative fabric for visible mends. Kids often love scars as part of the story.
Replace a Nose or Mouth
Best for missing embroidered features, use pearl cotton or thick embroidery floss.
Steps include marking position with pins or air-soluble marker, starting stitching from the bottom upward to prevent sagging, using parallel stitches with horizontal for mouth and vertical for nose, keeping tension even as too tight causes puckering, and burying the knot inside stuffing. Let the child pick the thread color. It turns repair into a bonding moment.
Replace Button Eyes Safely
Buttons are choking hazards for kids under 3. Use embroidered eyes instead.
Steps include marking eye positions with symmetry in mind, starting from the inside of the head, passing thread through fabric and button, using small tight stitches through each hole, tying knots under the button on the fabric side, and burying thread ends in stuffing. Sew on safety eyes with locking washers for durability as an alternative.
Choose the Right Professional Repair Service

When damage is severe or the toy is an heirloom, professional restoration is worth the investment. These specialists treat each toy as a memory worth preserving.
Fluff Restoration Services
Best for emotional full restorations, appointments begin July 1, 2026. This service collaborated with Netflix on Lost Ollie restoration.
Choose them for their focus on emotional healing and storytelling, their financial assistance waitlist for low-income clients, and their developing childrens book to guide families through repair. Ideal for heirloom toys, severely damaged plush, and memorial pieces.
StuffedZoo – Regina, Pittsburgh
Operating on Etsy with pricing at $60 per hour billed in 15-minute units, that is $15 per unit. Shipping is $20 flat rate to the United States only. Turnaround is estimated at July 21 to 29, 2026.
Client feedback highlights include repairs after dog attacks and exceeded expectations. Key feature is requiring photo and damage description before booking to ensure accurate quotes.
Secaucus Doll and Teddy Bear Hospital
Located in Secaucus, New Jersey, this hospital specializes in antique and vintage teddy bears. Founded by Luis H. Casas, now run by the Green Team.
Notable cases include Bill the Bear, a 40-year companion mauled by a dog and returned to his owner in the U.S. Navy, planned to pass to future children. Their mission is to recuperate and maintain the manifestation of memories and emotions.
Stuffed Animal Clinic of Madison
Located in Madison, Alabama, operated by Nicole, this clinic offers general repair, memory bears, and pet toy restoration.
Testimonials praise repairs of 1977 Chewbacca, fast shipping, and affordable pricing. Unique offerings include a prescription for care with every return and specialization in dog-damaged toys.
Compare: DIY vs. Professional Repair

| Factor | DIY Repair | Professional Repair |
|---|---|---|
| Cost | $5 to $15 for thread and needle | $60 or more per hour plus $20 shipping |
| Time | 30 minutes to 2 hours | Weeks to months due to high demand |
| Skill Level | Beginner-friendly | Expert craftsmanship |
| Emotional Support | Caregiver-led bonding | Personalized storytelling and updates |
| Durability | Moderate, varies by execution | High, reinforced with archival-grade materials |
| Best For | Minor tears, loose limbs, urgent fixes | Heirlooms, pet damage, vintage toys |
DIY works for small holes, loose limbs, and clean seams. Professionals handle missing parts, facial reconstruction, and high sentimental value.
Prevent Future Damage
An ounce of prevention keeps your plush toys in one piece for years.
Safe Storage Tips
Store in a cool dry place away from sunlight. Use cotton bags, not plastic, to prevent moisture buildup. Place cedar blocks to deter moths. Avoid mothballs because they are toxic.
Washing Guidelines
Hand-wash only with mild detergent. Never machine dry. Air-dry flat. Spot-clean stains with a damp cloth.
Supervise Play
Rotate toys to reduce wear. Keep plush away from pets when unsupervised. Repair small tears immediately. It prevents larger damage.
Honor the Toy’s Story
Every repair adds a chapter. Some parents choose visible mending with colorful patches or bold stitches to teach kids about resilience. Others prefer invisible repairs to preserve the original look.
Frame the old thread or keep a photo of the before state. It becomes part of the legacy. As one artisan said, “We are not just fixing toys. We are healing memories.”
Final Checklist: Repair Ready
Check that you have assessed the damage type, decided between DIY or professional help, gathered your tools, matched thread to fur or chosen expressive contrast, involved the child if appropriate, prioritized safety with no small parts for children under 3, and preserved the story. Scars and all, that soft worn face is not just fabric. It is love made visible, and with the right care, it can last a lifetime.
Frequently Asked Questions About Plush Toy Repair
How do I know if my stuffed animal needs professional repair or DIY?
Choose professional repair for heirloom toys, severe damage like missing limbs or facial destruction, antique or vintage pieces, or toys with mold. DIY works for minor tears, loose limbs, small holes, and clean seams that do not involve structural damage.
What is the average cost of professional plush toy repair?
Professional services typically charge $60 per hour, with additional shipping costs around $20. Minor professional repairs may cost $50 to $150, while full reconstructions can run higher depending on damage complexity.
Can I wash a damaged plush toy before repairing it?
Surface clean gently with a damp cloth if the toy is not heavily soiled. Avoid full washing damaged toys because water can worsen issues like matting or cause stuffing to shift. Air-dry completely before attempting any repair.
How long does professional plush toy repair take?
Turnaround varies by service and demand. Some shops quote 2 to 4 weeks, while others like Fluff Restoration have limited availability with appointments beginning July 1, 2026. High-demand periods may extend wait times to months.
Are button eyes safe for all ages?
No. Button eyes pose choking hazards for children under 3. Use embroidered eyes or safety eyes with locking washers instead for toys that will be used by toddlers.
Key Takeaways for Plush Toy Repair Success
Plush toy repair combines practical sewing skills with emotional care. Identify the damage type first, then choose between DIY fixes for minor issues and professional services for heirlooms or severe damage. Essential home repairs include ladder stitch for invisible seams, whip stitch for patches, and proper thread burial to protect little fingers. Professional services like Fluff Restoration, StuffedZoo, and Stuffed Animal Clinic of Madison specialize in emotional restoration with expertise in pet damage, vintage toys, and memory bears. Prevent future damage through proper storage, hand-washing, and immediate repair of small tears. Whether you stitch it yourself or send it to a plush hospital, the goal remains the same: returning comfort, continuity, and connection. That soft worn face is love made visible, and with the right care, it can last a lifetime.