Electric toy cars often stop working not because they are broken beyond repair, but due to simple electrical failures. Dead batteries, blown fuses, and corroded switches account for most non-functioning ride-on cars. With basic tools and this guide, you can restore most units and even upgrade them to perform better than new.
This article walks you through proven diagnostic methods, battery upgrade options, switch repairs, and performance enhancements. You will learn how to test circuits with a simple 12V bulb, replace outdated lead-acid batteries with modern lithium packs, and install smooth variable-speed throttles.
Diagnose Power Issues in Your Toy Car
When a toy car refuses to turn on, the problem usually lies in the power delivery chain. This includes the battery, fuse, switch, or wiring. Use simple tools to isolate the fault quickly without needing expensive equipment.
Test Battery with a Simple Light Bulb
Skip the multimeter. A 12V bulb and two wires can tell you if your battery has life.
- Strip the ends of two insulated wires.
- Attach one wire to each terminal of the 12V bulb.
- Touch the free ends to the battery terminals.
- Bright glow = healthy battery.
- Dim glow = weak but usable; recharge.
- No light = dead battery, replace.
Pro Tip: Test each 12V battery separately in a 24V system. One dead cell kills the entire circuit.
Check the Fuse on the Red Wire
Most toy cars have a fuse on the red wire near the battery. This component is often overlooked during troubleshooting.
- Disconnect the fuse from the circuit.
- Use the bulb setup across the fuse holder.
- Bulb lights = fuse is good.
- No light = blown fuse.
Replace with the same-rated fuse, or upgrade to a resettable circuit breaker to eliminate the need for spare fuses.
Clean Corroded Terminals
Oxidation blocks power flow. Look for white or green crust on battery posts, switch contacts, or connectors.
- Scrub with sandpaper or a small wire brush.
- Spray with WD-40 or petrol to dissolve stubborn corrosion.
- Wipe clean and reassemble tightly.
Warning: Always disconnect the battery before cleaning any terminals.
Replace or Upgrade the Battery
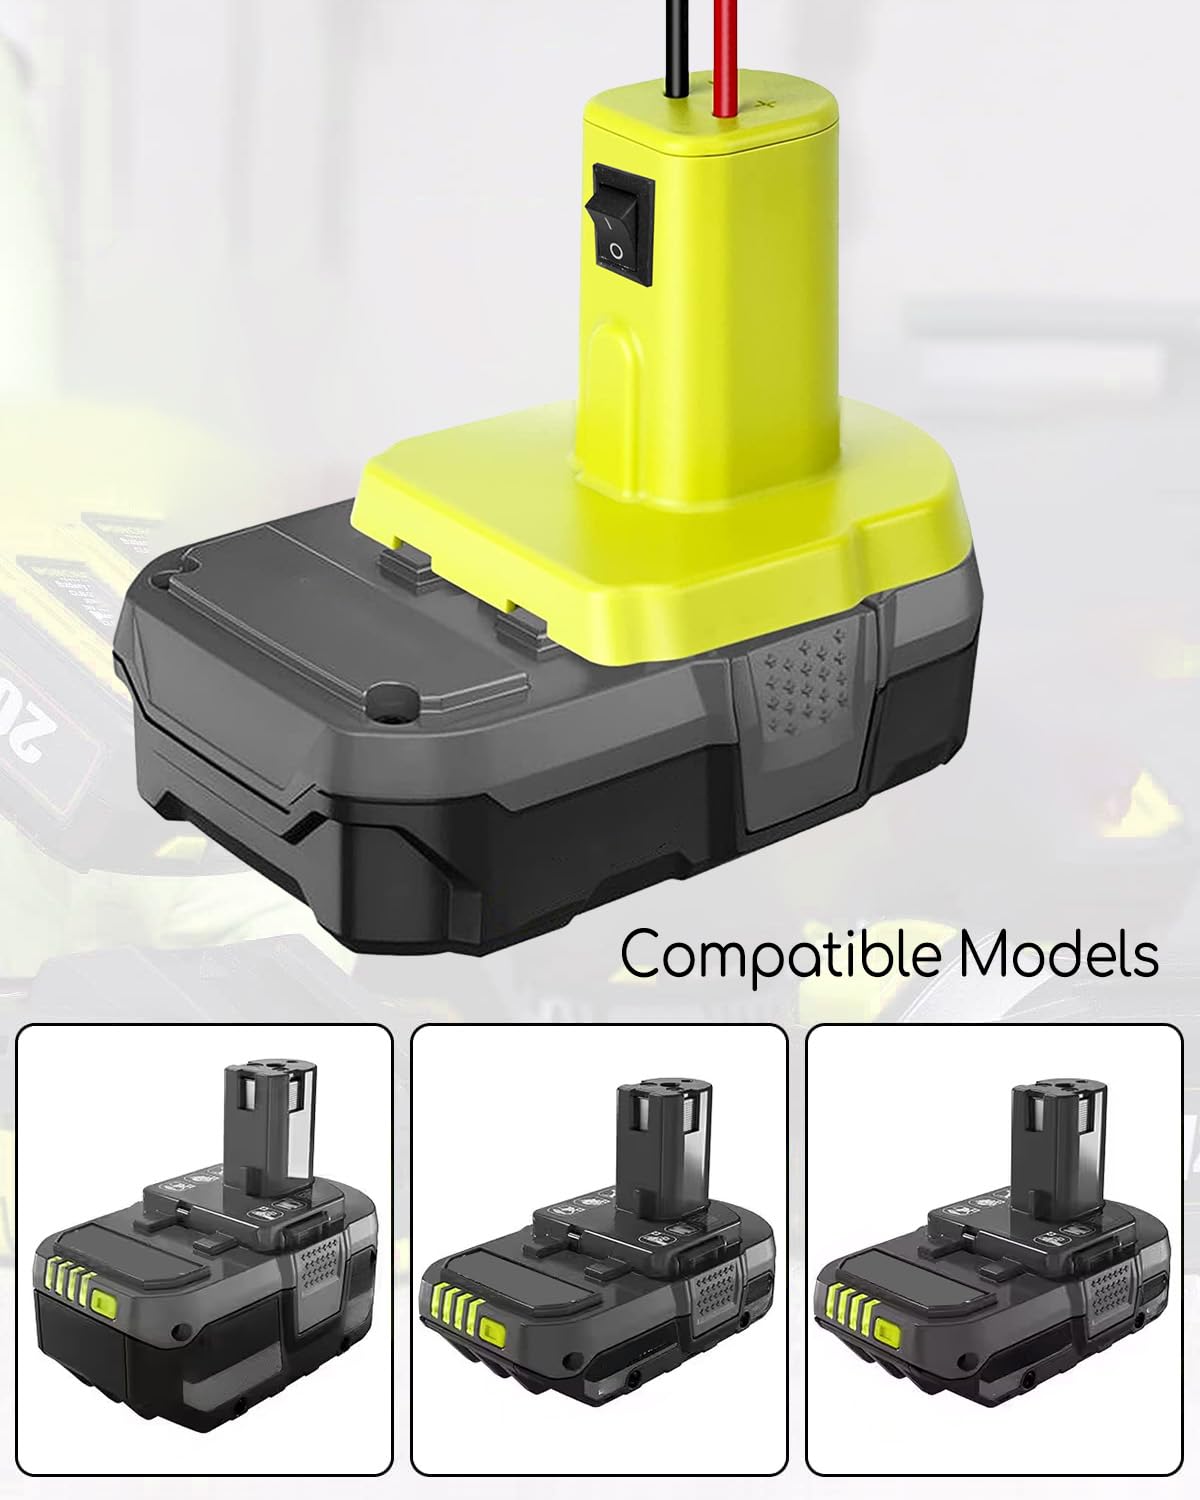
Dead batteries are the number one reason toy cars fail. Upgrading to modern lithium packs boosts runtime, power, and reliability significantly.
Standard 24V System Specifications
Most toy cars come with two 12V, 7Ah lead-acid batteries connected in series. This produces 24V at 7Ah with a maximum safe discharge of 32A. However, sustained high draw causes overheating, and these batteries typically die after one to two seasons.
Upgrade to 36V or 40V Lithium
Boost performance dramatically using Ryobi 20V lithium packs. Connect two 20V, 12Ah batteries in series for 40V, 12Ah. This nearly triples the energy from 168Wh to roughly 480Wh, delivering stronger torque, longer run time, and better hill climbing.
Note: Only attempt this if your motors and controller can handle higher voltage. Start with 36V if you are unsure about compatibility.
Why Choose Ryobi Over DeWalt
| Feature | Ryobi | DeWalt |
|---|---|---|
| Low-voltage protection | Yes, safe charging after deep discharge | Yes, but locks out completely |
| Plug-and-play use | Yes, no extra modules needed | No, requires bypass module |
| Best for beginners | Recommended | Only for experienced users |
Ryobi wins for toy car repair because no extra circuits are needed, and the batteries are widely available at most hardware stores.
Charging Safety Tips
- Always use a charger matched to battery chemistry.
- Never leave batteries unattended during the first charge.
- Stop immediately if the battery gets hot.
- Store at approximately 50% charge if unused for weeks.
Fix Faulty Switches
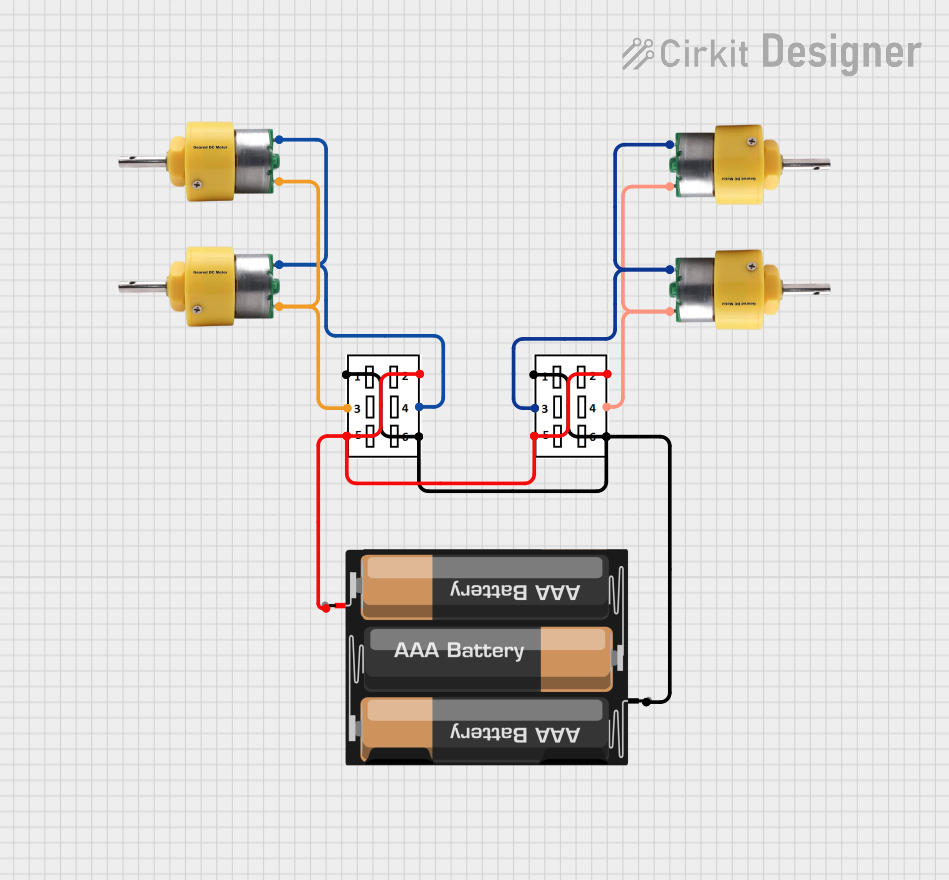
Switches fail from dirt, water, or general wear. Test all switches with the bulb method before replacing them.
Test the On/Off Switch
- Disconnect the switch from the circuit.
- Wire the bulb across its two terminals.
- Flip the switch.
- Bulb lights = switch works.
- No light = internal break, replace.
Replace with a heavy-duty toggle switch rated for 30 amps or more.
Diagnose Forward/Reverse Switch
This DPDT switch reverses motor polarity.
- Remove the switch from the circuit.
- Connect the bulb between the center terminal and one side.
- Move the lever to forward; the bulb should light up.
- Repeat for reverse.
- No light in either direction = bad switch.
- Only one direction works = internal contact failure.
Replace with a DPDT rocker switch available at auto or electronics stores.
Repair the Pedal Throttle Switch
Most basic toy cars use an on/off pedal switch, which causes jerky starts.
- Test with the bulb: press the pedal; the bulb should light.
- If no response, open the housing.
- Check for worn contacts or carbon buildup.
- Clean with sandpaper or replace entirely.
Upgrade Tip: Replace with a proportional throttle for smooth acceleration.
Install Variable Speed Control
Replace jerky on/off pedals with smooth, real-car-like acceleration using a variable-speed controller.
Benefits of Proportional Throttle
- Smooth starts with no sudden lurching.
- Speed-limit dial to set maximum speed for safety.
- Reduced motor stress and less heat buildup.
- Compatible with existing remote control features.
Wiring the Speed Controller
Connect battery positive to controller input positive. Connect controller output positive to motor positive. Connect battery negative to controller ground and motor ground. Finally, connect the forward/reverse switch to the controller direction control line.
Performance Outcomes After Upgrade
Successful operation has been observed at 40V with stable motor performance, smooth acceleration, and no overheating when the speed limiter is engaged. Some original features are preserved, including remote control functionality, steering servos, seatbelt sensors, and built-in audio systems.
Known Issues
Variable-speed systems may fail prematurely if the motor is incompatible with PWM frequency, if there is insufficient heat dissipation, or if there is excessive load without current limiting. Ensure the motor is rated for variable-speed operation and add thermal protection if needed.
Key Takeaways for Toy Car Repair
Toy car repair is highly accessible using basic tools and widely available components. The most frequent issue, dead batteries, can be resolved through replacement or upgrading to modern lithium systems like Ryobi 20V packs. Diagnostic testing with a simple 12V bulb eliminates the need for expensive multimeters. Upgrading to variable-speed controllers significantly improves performance and safety. Proper mounting, wiring, and use of resettable circuit breakers enhance durability. With these strategies, nearly any non-functional children’s electric car can be restored, often exceeding original performance.
Frequently Asked Questions About Toy Car Repair
How do I diagnose why my child’s toy car won’t move?
Start by testing the battery with a 12V bulb. If the bulb lights brightly, the battery is good. Then check the fuse on the red wire near the battery. If the fuse is good, test each switch using the bulb method to identify faulty components.
Can I upgrade my toy car battery to lithium?
Yes, you can upgrade from lead-acid to lithium batteries. Ryobi 20V packs are recommended because they are plug-and-play compatible and include built-in low-voltage protection. Two 20V batteries in series create a 40V system with significantly longer runtime.
Do I need special tools for toy car repair?
No. A 12V bulb, two insulated wires, sandpaper, and basic hand tools are sufficient. You do not need an expensive multimeter or specialized electronics knowledge.
Why does my toy car only move in one direction?
This indicates a problem with the forward/reverse switch or broken wiring in the reverse circuit. Test the DPDT switch with a bulb. If it only works in one direction, replace the switch.
How do I make my toy car faster?
Upgrade the battery voltage from 24V to 36V or 40V. Install a variable-speed controller with a speed-limiting dial. You can also check for a hidden high-speed mode screw under the seat or plastic cover that may have been secured by parents.