You’ve sketched a cute character, imagined it in soft fabric, and now you want to bring it to life. Learning how to make a plush toy that is huggable, well-crafted, and uniquely yours is achievable whether you’re a complete beginner or an aspiring designer. This guide walks you through every phase of plush creation, from choosing fabrics and stuffing to hand-stitching techniques and scaling up for commercial production.
By the end, you’ll know how to transform a simple idea into a tangible stuffed toy, avoid common pitfalls, and even produce custom plushies for sale. Let’s start with the materials and tools that form the foundation of every successful plush project.
Choose the Right Fabric for Your Plush Toy
The fabric you select defines the look, feel, and durability of your finished plush. Not all materials work equally well for beginners or advanced projects.
Fleece for Beginners
Fleece is the go-to fabric for new plush makers. It is affordable, non-stretchy, and does not fray, making it easy to cut and sew. Its flat texture hides seams moderately well and allows beginners to focus on mastering stitching without battling slippery material. Use fleece for mock-ups before cutting more expensive fabrics like minky.
Pro tip: Buy a range of colors from craft stores like Hobby Lobby to test designs quickly.
Minky for Soft, Fluffy Plushies
Minky is softer and fluffier than fleece, with a plush pile that gives professional results. Low-pile minky is easier to handle, while high-pile versions can slip during sewing and make seams more visible. However, minky excels at hiding stitches, with some seams appearing nearly invisible, just like store-bought plushies.
Because minky is pricier and harder to source locally, many crafters stockpile fabric scraps for future projects.
Why Cotton Falls Short for Most Plush Toys
While cotton is common in sewing, it is rarely ideal for plush toys. It creases easily, does not hold shape well, and lacks the soft, stuffed look most plush designs aim for. Stretchy or textured fabrics like fleece and minky create fuller, more huggable results.
Stuffing: How to Fill a Plush Toy Properly
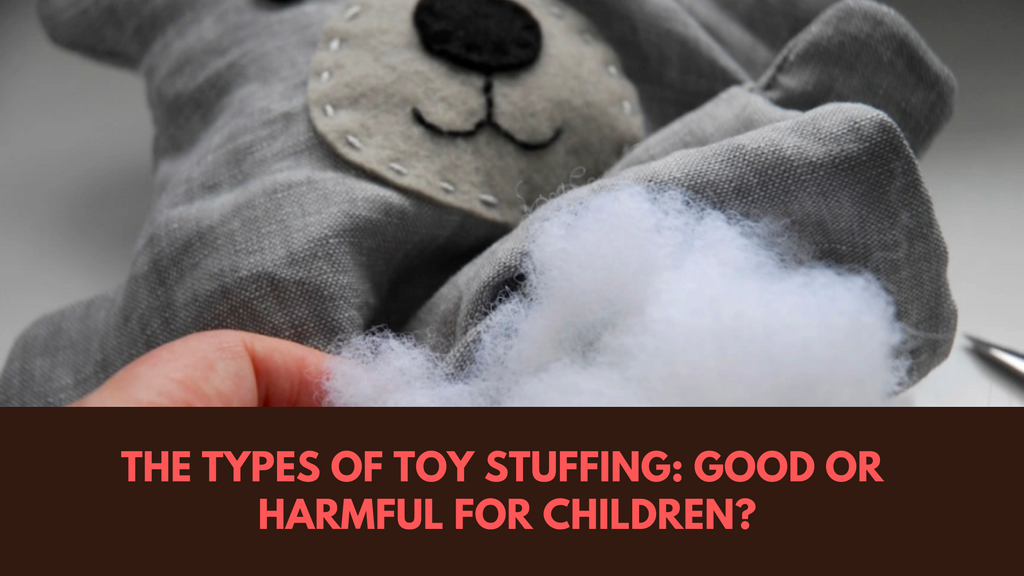
What is inside matters as much as the outside. Proper stuffing ensures your plush holds its shape and feels soft to the touch.
Use Fluffed Polyfill
Polyfill, the classic blue-bag stuffing from craft stores, is the standard for handmade plush toys. Premium brands like purple-bag options offer no real advantage in softness or durability. The key is how you use it.
Pull the polyfill apart before inserting. Fluff it slightly to eliminate clumps and ensure even distribution. Insert it little by little to maintain control, as overstuffing can stretch seams or distort the shape. Always stuff extremities first, such as fingers, ears, and tails, then fill the main body. Understuffing is safer because you can always add more later.
Add Weight with Poly Pellets
For plush toys that need to hang or sit upright, mix poly pellets with polyfill. These small plastic beads add heft without sacrificing softness. Use them in arms or bases to give your plush poseability, perfect for keychain-style toys or backpack companions.
Essential Tools for Plush Making

You do not need a high-end setup to start, but the right tools make the process smoother and more accurate.
Needles, Thread, and Clips
Use standard sewing needles and thread that matches your fabric. Matching thread hides seams and gives a polished finish. For facial details, black embroidery floss works well on most colors.
When sewing slippery fabrics like minky, sewing clips are better than pins. They will not damage the fabric and hold layers securely. Find affordable clips at stores like Daiso.
Sewing Machine versus Hand Sewing
Beginners often do better with hand sewing. It offers better tension control and precision, especially on small or curved seams. Use a back stitch for strength along main seams.
If you upgrade, a refurbished sewing machine from sewingmachinesplus.com can speed up body assembly. Machines excel at sewing long, curved seams like around a plush torso, but hand stitching still wins for closures and tight spots.
Marking Tools for Accuracy
Use fabric pens or a Sharpie to mark seam lines, darts, and placement guides directly on fabric. These visual cues help you align pieces correctly and maintain proportions. Arrows on patterns often indicate stretch direction or shaping, so follow them closely.
Master Key Hand Stitches for Plush Toys
Even with a machine, hand stitching is essential for finishing touches. Learn these three core techniques.
Running Stitch for Basting and Closure
The running stitch is simple: in and out, evenly spaced. Use it for temporary basting to hold layers together before final sewing. It is also ideal for closing stuffing openings. When joining two edges, alternate the needle between fabrics and pull tight after each pass for a clean, invisible closure.
Back Stitch for Strong Seams
The back stitch creates a durable, lockable seam. It is perfect for high-stress areas like where limbs attach. Unlike the running stitch, each new stitch overlaps the previous one, preventing unraveling.
Use it along body seams like down a character’s back to ensure long-term durability.
Ladder Stitch for Invisible Closures
The ladder stitch, also called the invisible seam stitch, is your go-to for closing stuffing holes without visible thread. Insert the needle under a fold on each side, pulling gently to close the gap like a zipper. When done right, the seam disappears completely.
This stitch is essential for attaching separate parts like a banana top or a detachable hood without breaking the toy’s aesthetic.
Start with Existing Plush Patterns
If you are new to plush making, do not design from scratch. Start with a proven pattern.
How to Read a Plush Pattern
Most free downloadable patterns include solid lines for cut edges, dotted lines for sewing lines, and arrows to indicate stretch or shaping direction. Darts, triangular folds sewn into fabric, are critical because they turn flat pieces into 3D shapes, giving your plush a round, cute silhouette.
Free patterns are available from creators like Choli Knight. A popular beginner choice is the Axolotl plush, which uses simple shapes and minimal pieces.
Test in Fleece First
Always mock up a new pattern in inexpensive fleece before cutting minky or specialty fabric. This lets you verify sizing, check seam alignment, and practice assembly without wasting costly materials.
Modify Patterns for Custom Designs
Once you are comfortable, tweak existing patterns to create something unique.
Adapt Shapes from Similar Plushies
You can turn an elephant pattern into a cow head or reuse body pieces with new ears and tails. One maker redesigned a Kurama plush by keeping the original torso but altering the tail and ears.
Always credit the original designer, even heavily modified versions build on someone else’s work.
Use Fleece for Fast Prototyping
Mock-ups do not need to look pretty. Use bright-colored thread so misaligned seams are easy to spot. The goal is to test structure, not aesthetics.
Iterate quickly: make, assess, alter, remake. The Lugia plush went through dozens of fleece prototypes before the final design.
Design a Plush Toy from Scratch
Ready to create your own? Designing from scratch is the most advanced level, but it is achievable with a structured process.
Sketch Multiple Angles
Start with front, side, and back views of your character. Include seam lines, facial features, and any structural elements like wings or tails. This becomes your reference sheet.
Break 3D Shape into 2D Pieces
Think like a puzzle: how can you cut flat fabric to form a rounded body? Use darts, curves, and seam allowances to shape volume. Some designers use 3D modeling software or UV unwrapping techniques from game design to visualize how flat patterns wrap around 3D forms.
But do not overcomplicate. Trial and error works just as well.
Build and Test Prototypes
Cut your first version from fleece. Assemble it, stuff it lightly, and evaluate whether proportions are correct, seams align, and it stands or sits as intended. Adjust the paper pattern, then repeat. Each prototype brings you closer to the final design.
Assemble Your First Plush Toy: Axolotl Example
Let us walk through a real beginner project, the Axolotl plush.
Gather the Pieces
You will need one front piece, one back piece, one tummy piece, four ear pieces in two pairs, one bottom piece, and four arm pieces in two pairs. Print and cut the pattern first. Transfer to fleece and cut all pieces precisely.
Attach the Tummy
Place the tummy piece on the front. Sew around the edge using a running stitch by hand or a machine. Hand sewing gives better control over tension.
Sew Limbs and Ears
Pair up arm pieces and sew along the curved edge. Leave a small opening. Turn inside out to hide the seam. Repeat for both arms and both sets of ears.
Build the Main Body
- Lay the front piece right side up.
- Place one arm and one ear between the front and back layers, with raw edges aligned.
- Pin or clip in place.
- Repeat on the other side.
- Place the back piece on top.
- Sew around the entire edge using a machine or back stitch by hand.
This sandwich method encases limbs and ears neatly inside the body.
Add Facial Details
Lightly sketch eye and nose positions with a pencil. Embroider using black embroidery floss for a soft look. For a more durable finish, use safety eyes, especially if the plush is for a child.
Stuff and Close
Insert fluffed polyfill gradually. Focus on filling ears, arms, and tail first. Do not overstuff. Underfilled plushies can be fixed, but overfilled ones may burst.
To close the bottom, place the bottom piece over the opening. Trim if needed to match the seam. Use a hand-sewn running stitch, alternating between fabrics and pulling tight after each pass. The result is a clean, secure closure that looks seamless.
Learn Plush Making with Online Classes
Improve your skills with structured learning from experienced instructors.
Craftsy Courses
Craftsy offers over 2,000 creative classes. Recommended courses for plush makers include Sewing Essentials, Startup Library for Sewing, Fun with Fleece, and Embroidery for Beginners.
New users can get one year of Craftsy Premium for $149 via referral links, available for the first 1,000 sign-ups. These courses build foundational skills that apply directly to plush construction.
Scale Up: Work with a Manufacturer
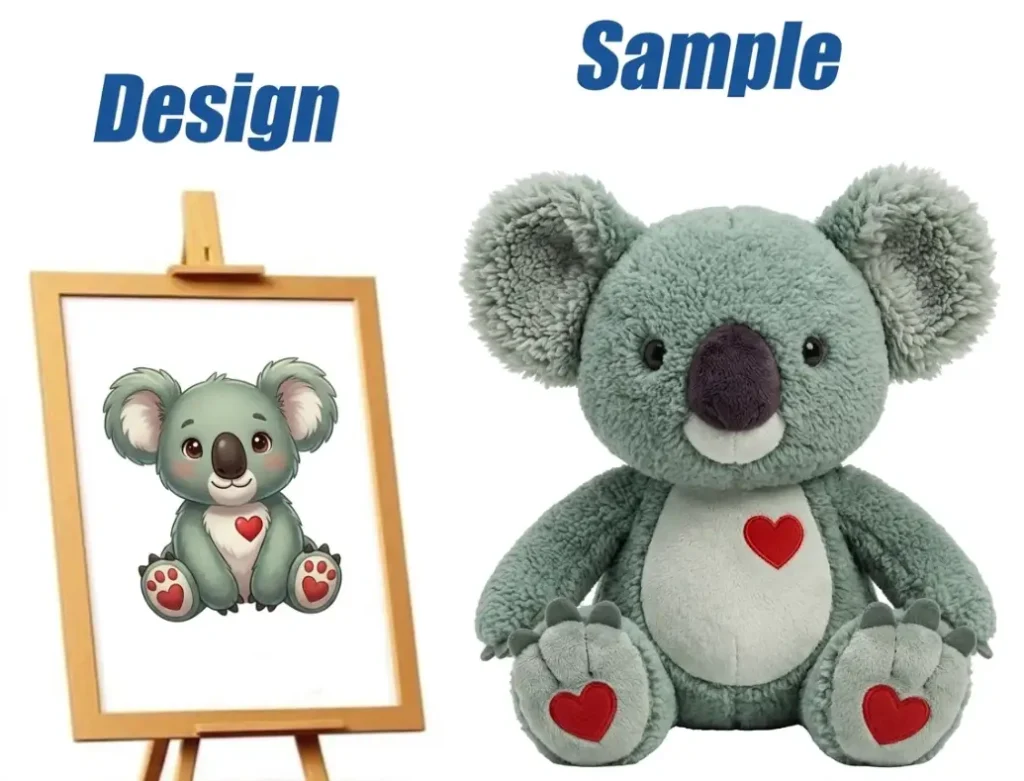
Want to produce custom plush toys in bulk? Here is how professionals do it.
Create a Design Reference Sheet
Compile front, side, and back views of your plush. Include seam placements, embroidery details, color blocking, and detached parts like wings. Annotate with notes such as solid color ears, fluffy tail, or black eyes with white highlight.
This sheet becomes your communication tool with manufacturers.
Order Samples from Multiple Factories
Use a middleman service like Catstealers LLC to connect with factories. Submit your design and pay around $100 per sample.
Order from two manufacturers to compare seam quality, fabric softness, embroidery precision, and design interpretation. One maker received a hydrocephalus dragon with an oversized head and had to request revisions.
Provide Clear Feedback
Send back annotated photos with red arrows, circles, and text like use ear shape from Sample #1, make back of ears solid blue, or reduce head size by 10%.
Also request vector files for embroidered elements to ensure accuracy in mass production.
Approve the Final Sample
Once you are satisfied, the manufacturer sends a physical sample for final review. Check stitch tightness, fabric softness, embroidery alignment, and overall huggability.
Factories often allow one final revision. Use it to add poseable wire to ears or limbs.
Legal and Safety Requirements for Selling Plush Toys
If you plan to sell plush toys, compliance is non-negotiable.
Lab Testing for Safety
Plush toys must be non-toxic and safe for children. Reputable factories provide lab test results proving compliance with U.S. or EU safety standards. Never skip this step.
Toy Registration in the U.S.
In states like Pennsylvania, importers must register toys with the Department of Labor and Industry. Submit an application for Pennsylvania Toy Registration along with one sample plush.
You will receive a registration number. The sample is not returned. To keep your original, ask the manufacturer to air-mail an extra sample.
Add Professional Touches to Your Plush
Small details elevate your plush from craft to product.
Sewn-In Tags
A custom label adds legitimacy and protects your design. Include your brand name, copyright notice, and website or social handle. Cost is around $1 per unit in bulk.
Poseable Features
Insert thin wire into ears, wings, or tails during final revisions. This allows the plush to be posed, great for display or photo props.
Avoid Common Plush-Making Mistakes
Even experienced makers slip up. Here is how to avoid the most frequent errors.
Overcomplicating Prototypes
Your first mock-up does not need perfect stitches. Focus on fit and proportion. Keep it messy. It is a test, not a final product.
Skipping Seam Allowances
Always include seam allowances in your patterns. Forgetting them causes pieces to come up short and misalign.
Choosing Hard-to-Sew Fabrics Too Soon
Stick with fleece or low-pile minky as you learn. High-pile or slippery fabrics increase difficulty and frustration.
Overstuffing
It is tempting to pack in extra stuffing for a firm feel, but overstuffing strains seams and distorts shape. Start light and build up.
Pricing Guide for Custom Plush Services
Not making it yourself? Here is what outsourcing costs according to major custom plush services.
| Service | Price |
|---|---|
| Kids’ Drawing to Plush | $17.99 and up |
| Illustration to Plush | $24.99 and up |
| Restore Damaged Plush | $80 |
| Pet Photo to Plush | $85.99 |
| Selfie to Plush | $79.99 |
| Video Game Character | $81.99 and up |
Over 8,700 designs have been turned into plush toys by one service alone. These prices reflect labor, materials, and quality control, so use them as benchmarks if pricing your own work.
Key Takeaways for Making Plush Toys
Learning how to make a plush toy is a rewarding creative journey that starts with simple materials and grows into complex designs. Start with fleece and basic patterns to build confidence, then progress to minky and custom modifications. Master essential stitches like the running stitch, back stitch, and ladder stitch for professional finishes. Always prototype in inexpensive fabric before cutting premium materials, and stuff gradually to avoid distortion.
If you plan to sell your creations, prioritize safety compliance and proper registration. Document everything from design files to lab test results, and communicate clearly with manufacturers using annotated images and vector files. Most importantly, enjoy the process. Every expert was once a beginner who made their first stitch and kept iterating until their vision came to life.
Frequently Asked Questions About Making Plush Toys
What is the best fabric for beginners making plush toys?
Fleece is the best fabric for beginners. It is affordable, does not fray, and is easy to cut and sew. Its flat texture helps hide imperfect seams while you practice stitching techniques.
How do I stop polyfill from clumping inside my plush?
Pull the polyfill apart and fluff it slightly before inserting. Add stuffing little by little rather than in large clumps. Ensure you reach all extremities like fingers, ears, and corners.
Can I make a plush toy without a sewing machine?
Yes, hand sewing is completely viable and often recommended for beginners. Use a back stitch for strong seams and a ladder stitch for invisible closures when finishing your plush.
How do I turn my drawing into a plush toy?
Start by sketching your character from multiple angles. Create a paper pattern by breaking the 3D shape into flat, sewable pieces. Test the pattern in inexpensive fleece, then sew the final version in your chosen fabric.
What is the average cost to outsource custom plush production?
Custom plush services typically charge $17.99 to $85.99 depending on complexity. Professional manufacturing with factories costs around $100 per sample with bulk production pricing varying by quantity and materials.
Do I need safety testing to sell plush toys?
Yes, plush toys must be non-toxic and safe for children. Reputable factories provide lab test results proving compliance with safety standards. If selling in certain U.S. states like Pennsylvania, you must also register your toys with the appropriate state agency.