You’ve got a character bouncing around in your head, a bold design with personality to spare. Now comes the exciting part: turning that idea into a real, holdable vinyl toy. Whether you’re an independent artist launching your first collectible or a hobbyist curious about the sofubi process, learning how to make a vinyl toy blends creative vision with hands-on manufacturing. This guide walks you through every stage, from initial sketch to final packaging, covering professional factory methods and DIY alternatives you can try at home.
By the end, you’ll understand the complete production workflow, know which method fits your budget and goals, and have the confidence to bring your character to life as a tangible piece of art.
Define Your Character Concept and Design
Before any modeling or molding begins, your character needs a clear, well-developed concept. Strong concept work prevents costly revisions later and ensures your vision translates accurately into 3D form.
Build a Cohesive Artistic Vision
Start with mood boards, character sketches, and thematic notes. Artists like Joe Ledbetter draw from personal archives of past ideas, keeping lists of character names and themes for future reference. Define your toy’s personality, whether it’s cute, edgy, robotic, or animal-based, and establish a consistent style, especially if you’re planning a series.
Make your design production-friendly from the start. Avoid overly delicate limbs, thin protrusions, or floating parts that could break during molding, handling, or shipping. Strong, solid shapes translate better to factory production.
Create Detailed 2D Sketches
Move from rough doodles to clean, detailed drawings using vector software like Adobe Illustrator. Focus on capturing character proportions, signature poses, and distinctive features that make your design memorable, such as an oversized head or unique texture pattern.
These refined sketches become the foundation for your technical turnaround sheets and give 3D modelers a clear reference point.
Build Technical Turnaround Sheets

A turnaround sheet is essentially your toy’s blueprint. It shows your design from multiple angles and guides sculptors and factories in accurately interpreting your 2D concept in three dimensions.
Include All Essential Viewing Angles
Your turnaround must show front, back, left side, right side, and top and bottom views when relevant. Use consistent scale and alignment across all views so measurements translate accurately.
Add annotations for key details like texture zones, articulation points, or where accessories attach. Clear notes prevent misunderstandings during production.
Specify Colors with Pantone Codes
Choose exact colors using Pantone codes for production accuracy. Youtooz uses over 3,000 Pantone shades across their releases. Indicate exactly where each color appears on the figure, breaking complex paint applications into zones like “blue helmet area” or “red boots.”
Some artists hand-paint prototypes first to test color transitions and finalize placement before committing to production colors.
Choose Your Prototyping Method
Decide early whether you’re creating one-off art pieces or planning mass production. Your prototyping method affects cost, timeline, and the final material quality of your toy.
Use 3D Modeling for Factory Production
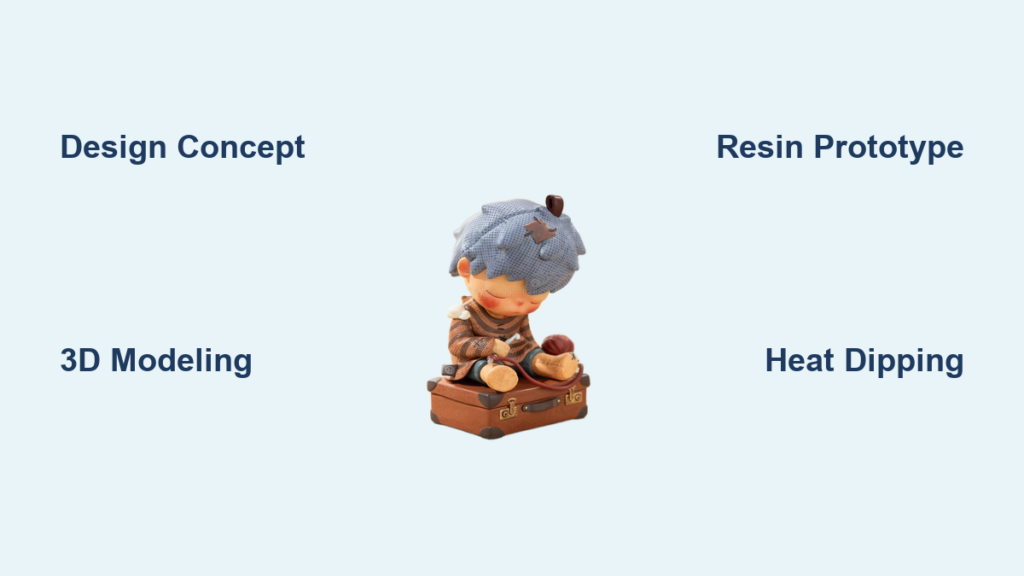
For traditional vinyl toys destined for mass production, convert your turnaround into a digital 3D model using ZBrush or Blender. This model becomes the basis for creating production molds.
Youtooz spends 8 to 16 hours per figure on 3D modeling alone. Factories often have in-house modelers who refine the sculpt for manufacturability, adjusting wall thickness and adding draft angles for proper mold release. You’ll review and approve digital renders before any physical prototypes are made.
3D Print Resin Prototypes for Testing
Print a high-resolution resin version using F69 flexible black resin or a 50/50 mix of F69 and Tough 74 for a soft, squishy feel that mimics soft vinyl. This approach offers benefits including no mold cost, fast turnaround, and great results for crowdfunding previews or limited resin runs.
PrintAWorld specializes in this method for artists who lack sculpting skills but want physical prototypes to test proportions and painting.
Try DIY Sofubi Prototyping at Home
For true soft vinyl (“sofubi”) creation in your own space, follow Shin Maru’s method. First, 3D print a flexible resin model. Then heat joint areas with a heat gun. Finally, cut and insert heated funnel-shaped connectors for articulation.
This creates poseable, durable figures that feel like factory-produced soft vinyl, all without expensive tooling.
Create and Approve Physical Prototypes

Your digital model must become real before production begins. This step confirms proportions, balance, and paint application work as intended.
Print High-Resolution Resin Models
Use SLA or DLP printers for smooth surface finishes. Print hollow with drain holes to save material and reduce weight. Post-process with isopropyl alcohol wash, UV curing, and sanding and priming if you plan to paint.
Paint and Finish for Approval
Hand-paint the prototype using Mr. Hobby Mr. Color for enamel finishes, Pro Acry for bright highlights, Tamiya Black for deep eyes, and gloss lacquer for shine. Photograph the finished piece under consistent lighting for vector tracing and factory reference.
Prepare for Mold Making
Once the prototype is approved, it’s time to build the steel mold that will mass-produce your vinyl toy.
Approve Wax or 3D-Printed Samples
Factories may create wax samples or 3D-printed versions from your final sculpt to verify sculpt fidelity, paint placement on curved surfaces, and articulation function. Respond quickly to sample reviews because delays here push back entire production timelines.
Cut Steel Molds with CNC
Molds are precision-cut from steel using CNC machines. They can weigh over 500 kilograms and require cranes to move. Simple figures need 4 to 8 weeks for mold creation, while complex multi-part molds can take up to 6 months.
Molds are recyclable and often reused for future variants, colorways, or limited editions.
Run Vinyl Injection Molding
With the mold ready, production begins using liquid vinyl and industrial machinery.
Inject Liquid Vinyl into Molds
The process involves pouring liquid plastisol vinyl into preheated steel molds. The molds rotate slowly, known as slush casting, to coat the interior evenly. The vinyl is then cooled to solidify into a shell, and parts are removed and trimmed.
Each molding cycle takes minutes, but full production runs take 3 to 4 weeks.
Assemble and Paint at Scale
After demolding, workers trim flash (excess vinyl), then parts are glued or snapped together. Painting is done via hand application, spray masking, or pad printing depending on complexity. Youtooz facilities in Shenzhen employ over 1,400 workers across dedicated production lines.
Build DIY Soft Vinyl Setup at Home

Want to make real soft vinyl toys without a factory? You can build a mini production setup with the right equipment.
Set Up a Heat Bath System
You need a stable heat source between 375 and 400 degrees Fahrenheit. The Hubbard Hall Quick-Tempered 275 melts at 275 degrees and remains safe up to 400 degrees, making it ideal. Avoid water (which boils at 212 degrees) or canola oil (which smokes near 400 degrees).
Use a collector’s stirrer from eBay or Amazon as a compact heating tank. This approach gives you a manageable workspace for small-batch sofubi production.
Add a Vacuum Chamber
Degass plastisol before use to remove air bubbles. Place plastisol in a vacuum chamber with a 7 CFM pump and run for 4 minutes. This creates smoother, stronger vinyl shells without trapped air that causes defects.
Use Heat-Stable Plastisol
Choose plastisol that can withstand high temperatures. Polymer Solutions offers PM 913 XR for opaque and translucent finishes and WS 900 Clear for transparent effects. Always wear gloves, a respirator, and eye protection when working with plastisol.
Master the Dipping Process
Sofubi is made by dipping metal molds into liquid vinyl. Replicate this process at home with careful technique.
First Dip: Form the Gel Skin
Dip your mold into a 375 to 400 degree bath for 12 to 15 seconds. Pull out slowly to control wall thickness, then immediately quench in cold water to stop curing. This forms a flexible gel layer inside the mold.
Manage Drips and Re-Dip
Hang the mold upside-down over a catch bucket to prevent pooling. Lightly bang the mold to release trapped salts, then return to the bath. Wipe the rim with a paper towel on a catch pan to avoid contamination between dips.
Second Dip: Final Cure
Re-dip for 1 to 1.5 minutes to fully cure the shell. This ensures even thickness and creates a durable final product that won’t tear easily.
Demold and Trim Your Vinyl Toy
Remove your vinyl figure while still warm for easier release and cleaner results.
Use Warm Release Technique
Pull parts at 200 to 240 degrees Fahrenheit using pliers. Use a DIY galvanized-pipe release station for leverage. Apply a pull-and-pop motion to collapse internal geometry for clean release.
Cold vinyl is brittle and may crack or tear during removal.
Trim While Warm
Use sharp blades or scissors. Warm vinyl cuts cleanly, like butter. Remove flash and clean seams carefully, taking care not to damage detailed areas.
Apply Color and Finish
Color defines your toy’s final look, whether applied in-mold or by hand.
Mix In-Mold Colors
Add heat-resistant, solvent-free pigments to plastisol before dipping. Pigments must withstand up to 400 degrees without burning or changing color. Test small batches first to verify results.
Polymer Solutions offers custom-blended pigments specifically designed for slush casting.
Hand-Paint Limited Editions
For prototypes or artist variants, use Color Forge for realistic skin tones, Mr. Hobby White for teeth using a dab technique, Pro Acry for vibrant highlights, and gloss lacquer for protective sheen. Airbrush for gradients and depth.
Vectorize Artwork for Factory Use
After painting, photograph and trace in Adobe Illustrator to create vector files for pad printing and spray masking templates. Joe Ledbetter spent 2 weeks vectorizing 12 figures across 144 angles. Clear templates prevent factory errors and ensure accurate paint placement.
Conduct Quality Assurance Sampling
Never skip quality checks. Sampling ensures your final product matches your vision.
Review Production Samples Carefully
Factories send photos of real production units for approval. Check color against Pantone swatches, verify size and balance, confirm paint accuracy, and inspect for surface defects. Prioritize major fixes because too many revisions cause new issues.
Enforce Strict Quality Control
Youtooz uses a 96-point checklist per figure. Factories are audited for Disney ILS compliance, Amfori Intertek Sedex standards, and worker safety. These checks ensure consistent quality across your entire production run.
Design and Produce Packaging
Packaging protects your toy and enhances its collectible value.
Choose the Right Box Type
Options include blind boxes for mystery collectibles, window boxes that show off the figure, and protective sleeves that prevent scratches. Create full-scale mock-ups to test fit and artwork alignment before production.
Finalize Artwork and Print
Provide vector packaging files to the factory. Print using offset printing for high-volume runs or digital printing for short quantities. Collaborate with artists on design, as Tectone did when designing patterns for Youtooz packaging.
Understand Costs and Minimum Orders
Know the financial realities before launching your project.
Know Minimum Order Quantities
Custom vinyl toys typically require a 300-unit minimum. Custom resin toys have no MOQ, making them ideal for small batches or testing markets. Lower quantities mean higher per-unit cost because mold fees and tooling are spread across fewer pieces.
Break Down Cost Factors
Pricing depends on figure size, sculpt complexity, number of paint applications, packaging materials, and edition size. Vinyl production requires mold fees and tooling costs that resin printing avoids. Factor these into your business planning.
Choose Your Production Path
Select the method that fits your goals, budget, and experience level.
DIY Sofubi for Full Creative Control
Best for artists and hobbyists wanting hands-on control. Pros include low startup cost and complete creative freedom. Cons include time intensity and safety risks when working with heat and fumes.
3D-Printed Resin for Testing Ideas
Best for testing designs, running crowdfunding campaigns, or producing limited editions. Pros include no mold cost and fast turnaround. Cons include not being true vinyl and less durability compared to factory-produced pieces.
Factory Production for Commercial Releases
Best for commercial releases and large runs. Pros include high quality and scalability. Cons include high upfront cost and minimum order requirements.
Learn from Professional Workflows
Study how successful studios approach vinyl toy production.
Joe Ledbetter’s Artist Process
Joe Ledbetter has created over 200 designer toys over 12+ years. He uses factory sculptors in China, paints hand prototypes to guide decoration, and emphasizes vector precision and team collaboration for quality results.
Youtooz Production Timeline
Average per figure includes 5 to 8 hours for concept, 5 to 8 hours for turnaround and color work, 8 to 16 hours for 3D modeling, 8 to 20 hours for packaging, 3 to 4 weeks for sampling, 4 to 8 weeks for molding, and 6 to 8 weeks for injection and assembly. Total time from sketch to shipment is approximately 4 to 6 months.
PrintAWorld’s Artist Service
PrintAWorld offers a full-service solution where you send a sketch and description, they handle 3D modeling and printing, paint your prototype, and produce small resin runs. This is ideal for artists without sculpting skills who want professional results.
Follow Safety and Maintenance Rules
Protect yourself and your equipment throughout the production process.
Use Proper Safety Gear
Always wear heat-resistant gloves, a respirator for fumes, and eye protection. Work in a well-ventilated space and never leave hot baths unattended. Handle nitrates and hot oil with extreme care.
Maintain Your Equipment
Clean the vacuum chamber after each use. Filter or replace heat bath medium regularly. Store plastisol and pigments in sealed, cool, dark containers to maintain quality.
Troubleshoot Common Issues
Keep your studio above 68 degrees Fahrenheit to prevent print failures in cold environments. Use maximum-thickness supports and print hollow with drain holes to avoid support breakage. Test paints on actual vinyl samples to prevent color mismatch. Always vectorize from physical painted prototypes rather than 2D sketches to avoid art deco distortion.
Explore Resin-to-Vinyl Hybrids
A growing trend involves 3D-printed figures that feel like soft vinyl.
Mix F69 and Tough 74 Resin
Combine 50% F69 (flexible) with 50% Tough 74 (strong) for a squishy, durable finish. This “res-fobby” method creates figures that can be articulated and painted like vinyl without any mold needed.
Understand Limitations
This approach produces not true vinyl and cannot scale for mass production. Color options are limited compared to traditional vinyl. However, it’s perfect for artist proofs, test models, or small collector drops.
Key Takeaways for Making Vinyl Toys
Creating a vinyl toy is a journey combining art, engineering, and patience. Start with a clear concept and production-friendly design. Use hand-painted samples and vector guides to ensure factory accuracy. Choose your production path based on budget: resin prototypes for testing, DIY sofubi for creative control, or factory production for commercial scale. Partner with trusted manufacturers or build your own mini setup. Whatever path you choose, prioritize safety, precision, and collaboration. Your character can become a real, collectible piece of art.
Frequently Asked Questions About Making Vinyl Toys
How long does it take to make a vinyl toy from start to finish?
The complete process takes approximately 4 to 6 months from initial sketch to shipped product. This includes concept development, 3D modeling, prototyping, mold creation (4 to 8 weeks), vinyl injection (3 to 4 weeks), and assembly and packaging (3 to 4 weeks).
Can I make a vinyl toy at home without a factory?
Yes, you can create soft vinyl toys at home using a heat bath system, vacuum chamber, and plastisol. This DIY approach works for small batches and gives you full creative control. However, it requires safety equipment and careful temperature management.
What is the minimum order quantity for custom vinyl toys?
Most factories require a minimum order of 300 units for custom vinyl toys. Custom resin toys have no MOQ, making them ideal for small runs or testing market interest before committing to larger production.
How much does it cost to produce a custom vinyl toy?
Costs depend on figure size, sculpt complexity, paint applications, and packaging. Beyond per-unit costs, expect to pay for 3D modeling, mold creation (which can take 4 to 8 weeks and cost thousands of dollars), and tooling. Resin 3D printing avoids mold costs entirely.
What materials are used to make vinyl toys?
Vinyl toys are made from plastisol, a liquid PVC compound that gels when heated. For DIY production, use heat-stable plastisol like Polymer Solutions PM 913 XR or WS 900 Clear. Factory production uses industrial-grade plastisol injected into steel molds.