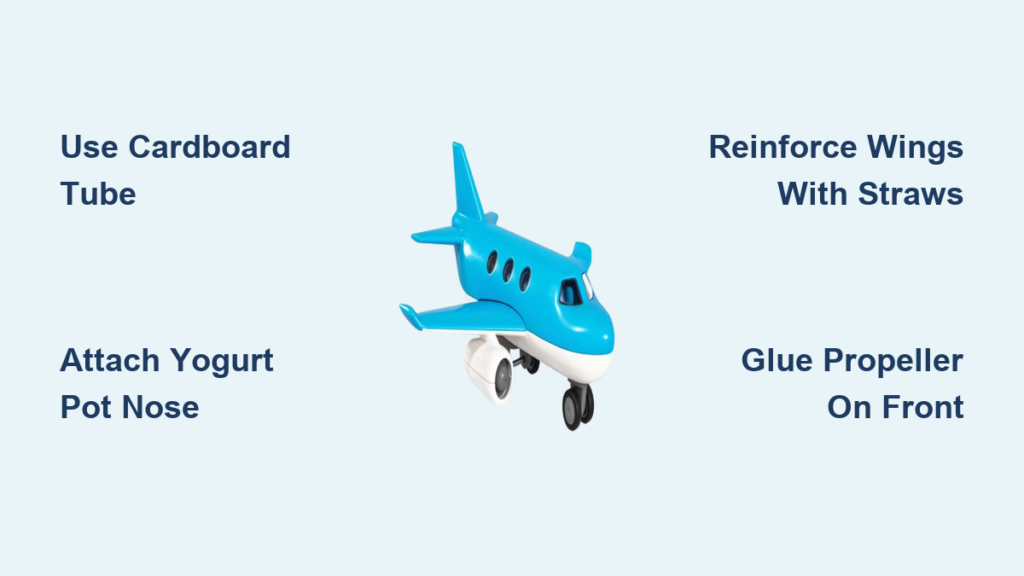
Imagine turning everyday trash into a roaring jet soaring through the living room. That’s the magic of making a toy airplane from recycled materials. Whether you are crafting with kids, hosting a themed party, or just looking for a fun DIY project, learning how to make a toy airplane opens the door to creativity, sustainability, and hands-on learning. This guide walks you through building a sturdy, customizable cardboard airplane using items you already have at home.
You will learn step-by-step assembly, smart design tips, safety precautions, and ways to turn this craft into an engaging educational activity. No special tools or skills are needed. Just gather your supplies, follow the steps, and let imagination take flight.
Gather Materials and Tools
Before cutting or gluing, collect everything you need to avoid mid-project delays. Using recycled household items keeps costs low and supports eco-friendly crafting.
Essential Supplies List
You will need these items to build your airplane:
- Cardboard tube from a paper towel roll
- Yoghurt pot for the nose cone
- Thin cardboard from cereal boxes
- Foam sheet or colored paper for wrapping
- Two straws for wing support
- Printable template for accurate cuts
- Hot glue gun with adult supervision
- Scissors or craft knife
- Paints, markers, and stickers for decoration
Prepare Before Starting
Print your template and check that it is scaled correctly. Flatten cereal boxes and clean the yoghurt pot thoroughly. Pre-cut straws to about 2 inches if desired. Lay out all materials on a protected workspace such as a newspaper or craft mat.
Pro Tip: Let kids help gather supplies. It builds excitement and responsibility before the real work begins.
Build the Airplane Body

Start with the core structure. The fuselage and nose form the backbone of your toy airplane and must be sturdy for attaching other parts.
Attach the Yogurt Pot to Cardboard Tube
Cut off the rim of the yoghurt pot using scissors. Apply hot glue around one end of the cardboard tube and insert it into the open bottom of the yoghurt pot. Press firmly and hold for 30 seconds until set. This creates a smooth, rounded nose just like real planes.
Safety Note: Hot glue guns reach high temperatures. Adults should handle all gluing steps involving the tube and pot.
Let the joint cool completely before moving on. A secure bond here prevents the nose from detaching during play or decoration.
Wrap and Decorate the Fuselage
Cut a foam sheet or colored paper to fit around the entire tube. Wrap it snugly and secure with hot glue at the seam. Now is the time to add windows, airline names, or fun patterns with markers.
You can also paint the wrap before attaching it for a cleaner finish. Let paint dry fully to avoid smudging.
Design Idea: Use metallic markers or silver foil to mimic jet metal finishes.
Cut and Reinforce Wings and Tail

Accuracy matters here. Misshapen wings can throw off the look and balance of the airplane.
Trace and Cut Wing and Tail Shapes
Use the printed template to trace two wing pieces, two tail fin pieces, and two propeller blades. Trace each onto flattened cereal box cardboard. Cut out both sets so you can glue them back-to-back for strength.
Cutting Tip: Use a craft knife on a cutting mat for clean edges, especially for small propeller details.
Double Up for Durability
Glue each pair of wings, tail, and propeller together front-to-front, leaving edges sealed. This creates a thick, rigid part that will not bend easily during play.
Let dry completely before handling. Reinforced wings support the body better and look more realistic.
Assemble the Tail Section
A stable tail keeps the airplane looking balanced and teaches kids about aircraft aerodynamics even if it does not fly.
Interlock Wing and Tail Notches
Cut a small vertical slit in the center of the rear wing. Cut a matching horizontal slot in the tail fin. Slide them together in a T-joint for a secure fit. Add a dab of hot glue to lock in place.
This mimics real airplane assembly and adds structural integrity to the tail section.
Notch the Body for Tail Support
Cut two 1 cm vertical slits on the back end of the cardboard tube. Insert the bottom of the rear wing into these slots. Glue the wing in place to prevent wobbling.
Now the tail assembly is anchored directly to the fuselage just like real planes.
Mount the Wings with Straws
This clever straw method lifts the wings off the body, giving your toy a true biplane or high-wing appearance.
Attach Straws to Lower Wing
Cut two straws to 2-inch lengths. Position them vertically on the lower wing, one on each side of where the fuselage will sit. Glue securely with hot glue.
Wait for the glue to set before proceeding. Wobbly straws mean crooked wings.
Connect Upper and Lower Wings
Place the cardboard tube between the straws. Glue the bottom of the tube to the lower wing to stabilize it.
Then, apply glue to the top ends of the straws and press the upper wing down firmly. Hold for 30 seconds.
Visual Check: Wings should be level and parallel. Check from the front and side view.
This three-part wing system creates a strong, floating effect and protects the body during play.
Install the Propeller
The final touch says ready for takeoff.
Glue Propeller to Nose
Apply hot glue to the center back of the propeller. Press it flat against the front of the yoghurt pot. Center it carefully so it looks balanced.
Hold in place for 20 to 30 seconds. Let dry fully before moving the airplane.
Creative Option: Use a small bead behind the propeller to give it a 3D spinner effect.
Now the airplane has all major parts: fuselage, wings, tail, and propeller, just like a real aircraft.
Customize Colors and Design
This is where every child makes the plane their own.
Choose a Color Scheme
Pick a look that matches your vision. For a classic two-tone, try white with red trim or blue with yellow stripes. Complementary colors like blue and orange, red and green, or purple and yellow pop visually. Let kids go wild with a rainbow design.
Paint or color the wings, tail, and body before final assembly for best results.
Personalize the Fuselage
Add fun details such as drawing a pilot face in the cockpit window. Write an airline name like Sky Kids Airlines or Super Jet 1. Add windows along the body with a silver marker. Stick on foam clouds or star stickers for a space-flight theme.
Pro Tip: Laminate with clear tape to protect artwork and add shine.
Use as a Party Activity
Turn crafting into a memorable event.
Host an Airplane-Making Station
Set up a table at a birthday party or classroom with pre-printed templates, pre-cut cardboard parts, assorted paints, markers, stickers, and safety scissors and glue guns for adults. Let each child build and decorate their own airplane.
Encourage Eco Participation
Ask guests to bring clean yogurt cups or cardboard tubes from home. This teaches recycling while reducing your prep work.
Offer small prizes for categories such as most creative design, best use of recycled materials, or coolest airline name. Kids go home with a unique toy and a sense of accomplishment.
Teach Sustainability Through Crafting
This project is more than fun. It is a lesson in eco-living.
Repurpose Common Waste
Show kids how everyday items become treasures. Toilet paper rolls become airplane bodies. Yoghurt pots become nose cones. Cereal boxes become wings. Plastic straws become structural supports.
Talk about landfills and how reusing items helps the planet.
Discuss Real-World Recycling
Ask questions like what else could we make from cardboard tubes, why is plastic hard to recycle, and how can we reduce waste at home. This turns crafting into a mini science and civics lesson.
Follow Safety Best Practices
Keep the fun accident-free with smart precautions.
Supervise Hot Glue Use
Hot glue guns can cause burns in seconds. Adults should handle all high-heat gluing, keep cords away from edges, and let glue cool before handing to children. Use school-safe glue like white PVA for minor decorations if adult help is not available.
Handle Sharp Tools Carefully
Scissors and craft knives should only be used by older kids or adults. Younger children can trace, color, or stick on decorations. Always cut away from the body and keep fingers clear.
Secure All Parts
Check that wings do not wobble, propeller is firmly glued, and no loose edges can peel during play. A well-built toy lasts longer and is safer.
Maintain and Store Your Airplane
Keep it looking great for weeks or months.
Protect from Moisture
Cardboard weakens when wet. Avoid humid areas and clean spills quickly. Laminate wings or spray with clear acrylic sealer for extra protection.
Repair Loose Parts
If a wing loosens, re-glue with hot glue. Reinforce with tape if needed. Store flat in a dry place to prevent warping.
Frequently Asked Questions About Making a Toy Airplane
What materials do I need to make a toy airplane?
You will need a cardboard tube, yogurt pot, thin cardboard from cereal boxes, foam sheet or colored paper, two straws, a printable template, hot glue gun, scissors, and paints or markers for decoration. All items are commonly found in most households.
Can children make this toy airplane unsupervised?
Younger children can participate in gathering materials, tracing, coloring, and sticker placement. However, adults should handle all hot glue gun use and cutting with craft knives to prevent burns and cuts.
How long does it take to build a toy airplane?
The project takes approximately 1 to 2 hours including drying time for glue. This makes it perfect for an afternoon activity or party station.
Is this a flying toy airplane?
No, this is a display and pretend-play toy. Its design mimics real aircraft elements including fuselage, wings, tail, and propeller, but it is not designed for actual flight.
How can I make the airplane more durable?
Double up all cardboard parts by gluing them back-to-back. Use a hot glue gun for strong bonds. Consider laminating decorated surfaces or applying clear acrylic sealer for protection against wear.
Key Takeaways for Making a Toy Airplane
Making a toy airplane is more than a craft. It is a gateway to creativity, learning, and green habits. With simple materials and clear steps, anyone can build a durable, imaginative model that teaches design, structure, and sustainability.
The project uses common household items like cardboard tubes, yogurt pots, and cereal boxes, transforming waste into toys. This teaches children about recycling while building hands-on construction skills.
Whether for play, display, or education, this project delivers big rewards from small beginnings. Follow the step-by-step guide, prioritize safety with adult supervision for hot glue, and let creativity soar. Now that you know how to make a toy airplane, it is time to clear the runway and let imagination take flight.