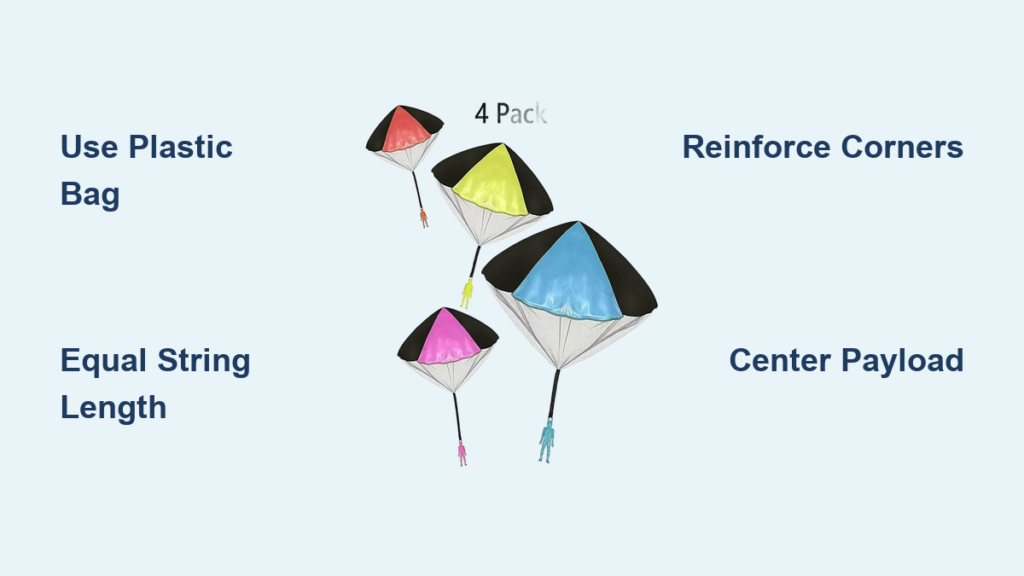
Have you ever watched a real parachute drift slowly down from the sky and wondered how it works? You can recreate that magic at home with a simple parachute toy made from everyday materials. This hands-on project is not just fun, it is a powerful way to explore science concepts like gravity, air resistance, and motion. Whether you are a parent, teacher, or curious maker, learning how to make a parachute toy opens the door to engaging STEM learning for kids and adults alike.
Using only a plastic bag, string, tape, and a small toy, you can build a working parachute in minutes. Three proven designs offer flexibility based on your supplies and goals. Each version demonstrates how surface area and balance affect descent speed. After building, test your design from a staircase or balcony, then tweak it to make it fall slower or land straighter.
Choose Your Canopy Material
The canopy is the heart of your parachute toy. It catches air and creates drag to slow the fall. Pick one that matches your needs for strength, weight, and availability.
Plastic Bag: Best All-Around Option
The plastic bag is the most commonly used material and offers the best balance of performance and durability.
• Cut from a grocery bag or thin packaging
• Lightweight, durable, and water-resistant
• Easy to cut into circles or squares
• Holds knots and tape well
• Pro tip: Use double-sided tape at attachment points to prevent tearing
Coffee Filter: Quick and Simple
Coffee filters work well for quick indoor experiments and younger builders.
• Naturally dome-shaped, no cutting needed
• Very light, so it floats slowly
• Fragile when wet or handled roughly
• Ideal for indoor tests and young kids
Tissue Paper: Lightest Choice
Tissue paper creates the slowest descent but is best for one-time experiments.
• Extremely low weight equals slow descent
• Tears easily
• Great for comparing materials
Fabric or Thin Plastic Sheet
For reusable projects that need extra durability.
• Reusable and sturdy
• May allow more air leakage, reducing drag
• Best if reinforced at corners
Winner: For most builders, a plastic bag offers the best mix of performance and durability.
Cut and Attach Suspension Lines
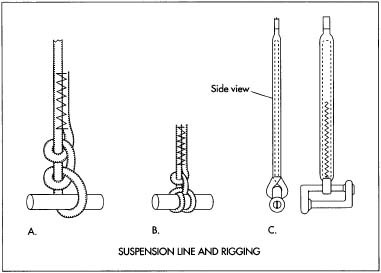
Strings connect the canopy to the toy. Getting them right ensures a smooth, stable flight.
Pick the Right Number of Strings
The number of strings affects balance and stability.
• Four strings: Easiest for beginners, works with light toys
• Six strings: Better balance, handles heavier payloads
• More strings equal more stability
Testing shows six-string designs resist tipping better than four-string ones.
Set String Length and Type
All strings must be exactly the same length for proper balance.
• Cut all strings to 12 inches (30 cm)
• Use cotton string, embroidery floss, or yarn
• Fishing line works but is harder to tie
• Critical: All strings must be exactly the same length
Even a one-inch difference can cause spinning or tipping.
Build a Circular Parachute (6-String Design)
This version offers excellent stability and is perfect for slightly heavier toys like action figures.
Draw a Perfect Circle
Creating a precise circle ensures even air capture.
- Tie a marker to one end of a six-inch string
- Hold the other end at the center of the plastic bag
- Rotate the marker around to draw a 12-inch diameter circle
- Carefully cut it out
Reinforce Attachment Points
Strong attachment points prevent tears during flight.
- Mark six evenly spaced spots around the edge
- Apply double-sided tape at each spot
- Punch small holes (do not just poke to prevent tearing)
Tie and Secure Strings
Secure knots keep the parachute intact during descent.
- Thread one string through each hole
- Double-knot tightly
- Trim excess string
- Check that all knots are secure and level
Bundle Strings for Payload
The bundle holds your toy securely during flight.
- Gather all free ends together
- Wrap tightly with a rubber band or hair tie
- This bundle will hold your toy
Attach and Balance the Toy
Proper balance prevents tilting or spinning.
- Place the toy (like a LEGO figure) on top of the bundle
- Flip the assembly upside down
- Wrap the strings around the base in a straight line
- Tuck and secure so the toy stays centered
Warning: An off-center toy will cause the parachute to tilt or spin.
Make a Square Parachute (4-String Design)
Simple, fast, and great for decorating, this design is ideal for classrooms or quick builds.
Cut a 12-Inch Square
A square canopy is easier to cut accurately for beginners.
- Use a ruler and marker to draw a 12-inch by 12-inch (30 cm by 30 cm) square
- Cut carefully with scissors
- Optional: Decorate with crayons or markers before adding strings
Punch Holes in Each Corner
Clean holes prevent tearing at stress points.
- Use a hole punch or carefully cut small slits
- One hole per corner
- Reinforce with clear tape if needed
Attach Equal-Length Strings
Even strings ensure stable flight.
- Cut four 12-inch strings
- Thread one through each corner hole
- Tie with double knots
- Confirm all strings hang evenly
Connect with a Paperclip
A paperclip creates a simple hanging point.
- Gather the loose ends
- Clip them together using a small paperclip or plastic connector
- This becomes the hanging point for your toy
Hook on the Payload
The payload attaches easily to the clip.
- Clip a LEGO minifigure, small doll, or button onto the paperclip
- Make sure it hangs straight
- Adjust if the figure leans to one side
Bonus: Kids love personalizing their square parachutes with drawings or names.
Try the Waist-Harness Method (For LEGO Figures)
This design attaches strings directly to the toy for a sleek, integrated look.
Wrap String Around Figurine Waist
The waist provides a secure anchor point.
- Use a short piece of string to tie around the LEGO man’s waist
- Double-knot and reinforce with clear tape
- This anchor point holds all suspension lines
Attach Four Strings to the Waist
Even distribution improves stability.
- Tie one end of each string to the taped waist area
- Space them evenly (front, back, left, right)
- Ensure all are tight and secure
Create the Canopy
The canopy forms the drag surface.
- Use a coffee filter (ideal) or cut a small circle from plastic
- Attach the free ends of the strings to the outer edge
- Tape or tie through tiny holes
- Pull up: the canopy should form a dome
Test Balance Before Flight
Checking alignment prevents mid-flight problems.
- Hold by the canopy and check alignment
- The figure should hang vertically and centered
- Adjust any slack strings
In tests, this design floated slowly even when briefly stuck mid-air.
Optimize Performance: Size, Shape, and Balance

A working parachute is just the start. Now improve it.
Increase Canopy Size for Slower Descent
Larger canopies create more drag.
• Try an 18-inch diameter circle
• Larger surface area equals more air resistance
• Pro tip: With an 18-inch canopy and eight strings, descent slows dramatically
Compare Shapes
Different shapes affect flight behavior differently.
| Shape | Flight Behavior |
|---|---|
| Circle | Smooth, stable, symmetrical |
| Square | Slight wobble possible, easy to build |
| Dome (coffee filter) | Fast setup, may stick together when damp |
Science fact: Larger surface area creates more drag, slowing the fall.
Fix Common Flight Problems
Address these issues to improve your parachute.
Falls too fast?
• Cause: Not enough drag
• Fix: Use a bigger canopy
Spins or tips over?
• Cause: Uneven strings or off-center toy
• Fix: Re-measure strings, reposition payload
Strings tangle?
• Cause: Too long or poorly bundled
• Fix: Shorten strings, use a clip instead of a knot
Canopy tears at corners?
• Cause: Weak attachment
• Fix: Reinforce with double-sided tape
Gets stuck mid-air?
• Cause: Material clings (like coffee filter)
• Fix: Use smoother plastic, avoid humid areas
Test Your Parachute Safely
Good testing leads to better designs.
Pick a Safe Drop Zone
Safety should always come first.
• Indoors: Top of a staircase or high step
• Outdoors: Low balcony or porch (never from windows or roofs)
• Avoid windy areas
Follow a Test Routine
A consistent routine helps you compare results.
- Hold the parachute by the canopy (top up)
- Release cleanly (do not throw)
- Watch: Does it open fully? Does the toy stay centered? How fast does it fall?
- Record results: Floats, Spins, Fast Drop
Iterate for Improvement
Each test is a learning opportunity.
• Change one thing at a time: bigger canopy, longer strings, heavier or lighter toy
• Retest after each change
• Keep notes on what works best
Example: A student found their parachute fell too fast so they increased the canopy size by 50 percent. Result: a much slower, smoother landing.
Teach STEM with Parachute Physics
This project turns play into powerful learning.
Core Science Concepts
Understanding the physics makes the project more meaningful.
• Gravity: Pulls the toy down
• Air resistance (drag): Pushes up against the canopy
• Surface area: Bigger canopy equals more drag equals slower fall
• Balance: Centered weight equals stable flight
Ask kids: Why do you think it fell so fast? What if we used a bigger bag?
Practice the Engineering Cycle
Real engineers follow this same process.
- Build your design
- Test it from a height
- Evaluate what worked or failed
- Improve and try again
This mirrors how real engineers solve problems.
Inspire with Bessie Coleman
Bessie Coleman was the first Black and Indigenous woman to earn a pilot’s license. She was also interested in parachute jumping. She faced huge barriers but never gave up. Her story teaches resilience, courage, and curiosity, just like building and improving a parachute toy.
Safety Tips and Best Practices
Keep the fun safe and successful.
Scissors Safety
Cutting requires careful attention.
• Always supervise children
• Cut slowly and keep fingers clear
• Use child-safe scissors for younger builders
Safe Testing Heights
Height choices matter for safety.
• Use stairs, not ladders or railings
• No dropping from high windows or roofs
• Test indoors when possible
Material Safety
Choose safe materials for your payload.
• Avoid sharp objects or heavy weights
• Do not use glass or metal parts
• Choose soft toys or lightweight clips
Final Build Checklist
Before your first drop, verify these items.
• Canopy is at least 12 inches wide
• All strings are equal length (12 inches)
• Attachment points are reinforced with tape
• Knots are double-tied and secure
• Payload is centered and balanced
• Drop zone is safe and clear
Pro upgrade: For ultra-slow descents, go with an 18-inch canopy plus eight strings.
Key Takeaways for Making a Parachute Toy

Learning how to make a parachute toy is more than a craft. It is a gateway to science, engineering, and perseverance. With just a plastic bag, some string, and a small toy, you can create a working model that floats gently to the ground, demonstrating real physics in action. Whether you choose the circular, square, or dome design, each teaches valuable lessons about drag, balance, and iteration.
By testing, failing, and improving, kids and adults practice the same problem-solving skills used by real scientists and engineers. Start with the circular six-string design for best stability. Use a plastic bag canopy, cut 12-inch strings, and reinforce attachment points with tape. Test from a safe height, record your results, and make one change at a time to improve performance.
With role models like Bessie Coleman, this project becomes not just educational but inspiring. So gather your materials, pick a design, and launch your first parachute. Then tweak it. Improve it. Make it better. That is where the real learning begins.
Frequently Asked Questions About Making a Parachute Toy
What is the best material for a parachute canopy?
A plastic grocery bag offers the best balance of strength, weight, and availability. It is lightweight, durable, water-resistant, and easy to cut into various shapes. Coffee filters work for quick indoor experiments, while tissue paper creates the slowest descent but tears easily.
How many strings should a parachute toy have?
Four strings work well for beginners and light toys. Six strings provide better balance and stability, especially for heavier payloads. More strings distribute weight more evenly and reduce tipping or spinning during descent.
Why does my parachute spin or tip over?
Spinning usually happens when strings are not equal in length or the payload is off-center. Even a one-inch difference in string length can cause tilting. Check that all strings are exactly the same length and that your toy is centered on the harness.
How can I make my parachute fall slower?
Increase the canopy size to create more air resistance. A larger surface area generates more drag, slowing the descent. You can also try using longer strings or adding more suspension lines (up to eight) for ultra-slow descents.
What kind of toy should I use as a payload?
Lightweight toys work best, such as LEGO minifigures, small dolls, action figures, or plastic clips. The toy must be light enough to be slowed by the canopy. Heavier payloads require larger canopies or more suspension lines to maintain slow descent.